Often, the items you find at the dollar store are:
- boring,
- not your style, or
- something you have no use for.
But given how inexpensive the items are, if you think outside the box just a little, you can often embellish the boring, alter the not-quite-your-style, and (sometimes) use the things you “have no use for” as raw materials for something else.
These “redos” don’t necessarily have to be high-skill, complicated projects, either. Often just a simple coat of paint or dip in dye, or a small embellishment added to something will make all the difference.
Just to give you some ideas, I picked up all of the following items in a single trip to Dollar Tree a few weeks ago and have transformed each item. Some of the projects were a little more, well, project-like. But some were pretty simple. In many cases, the only time-consuming part was drying time. (I did have a few less-than-stellar outcomes, but most of them are pretty decent.)
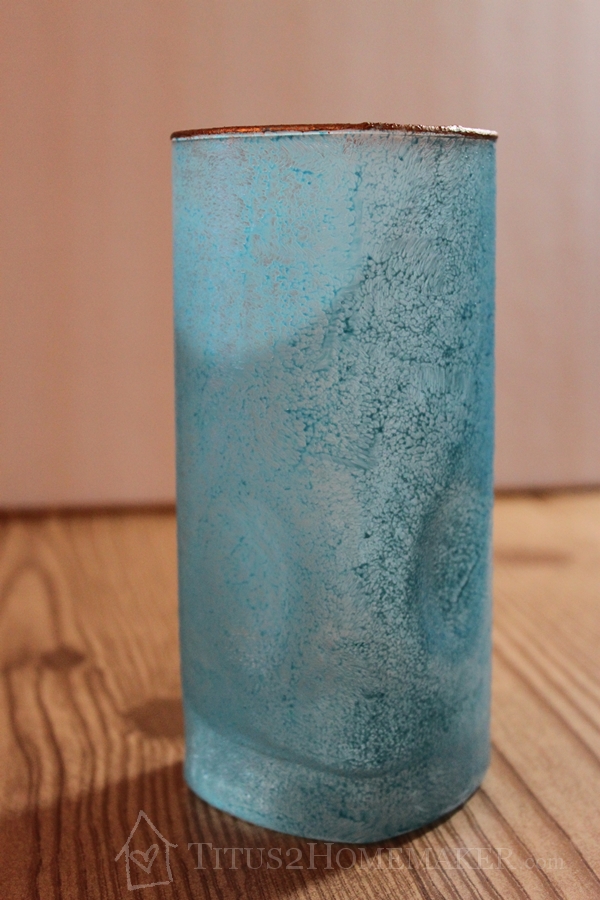
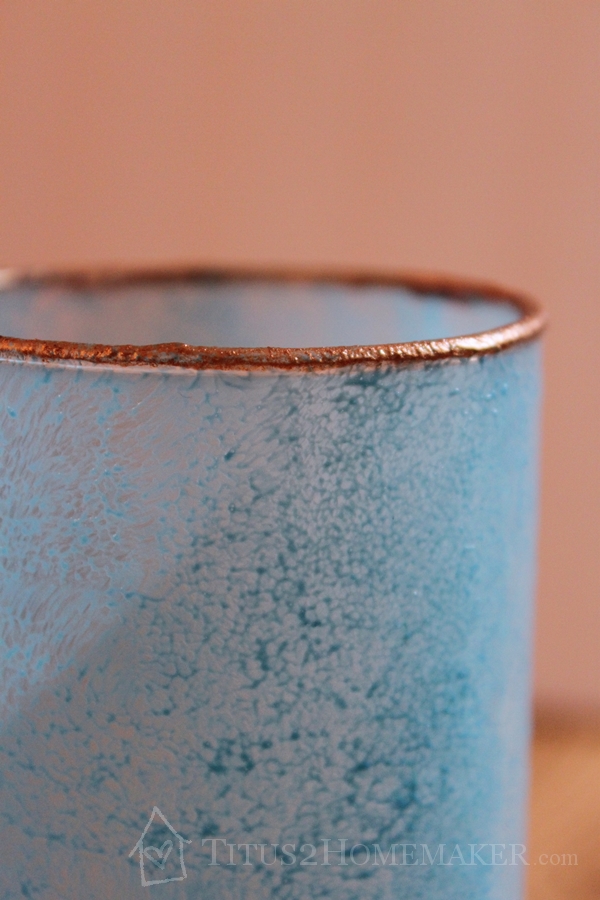
Vase

I think this was actually meant to be a drinking glass. It’s nice as-is, but a little plain. I liked the texture, so I didn’t want to totally cover that up, but I wanted to add some color.
What I did:
Mixed some acrylic paint into some Mod Podge to tint it. I couldn’t find my regular Mod Podge, so I used the kind meant for fabric, which is considerably thicker. As a result this is not as translucent as it otherwise would be. I sponged that on and let it dry. Then I dabbed this bronze leafing stuff onto the rim (with a cotton ball — very fancy 😉 ).
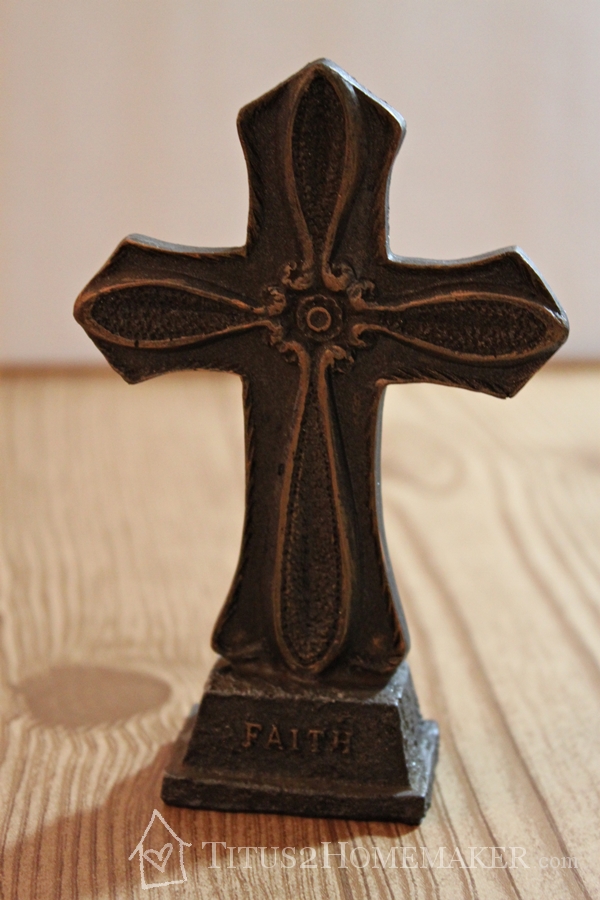
Decorative Cross
This decorative cross was also nice enough as-is, but I wanted nicer. This was pretty simple, too.
What I did:
I had some leftover oil-rubbed bronze spray paint from a project in my front yard. (Actually, I ran out. Only the front of this is currently painted. I’ll need to get some more to finish it — and the next stage of my yard project!) This particular rubbed bronze paint is quite dark — almost black.
So after the paint had dried, I took my bronze acrylic paint — which is much more of a brown sort of metallic — and squeezed out a dot of paint. I dipped my finger in, rubbed it around on a dry spot so I didn’t have any excess paint “puddled” on my fingers, and gently rubbed the paint onto the raised surfaces of the cross. It definitely wasn’t complicated and didn’t take any notable skill! But I really like the way this looks.

Journal
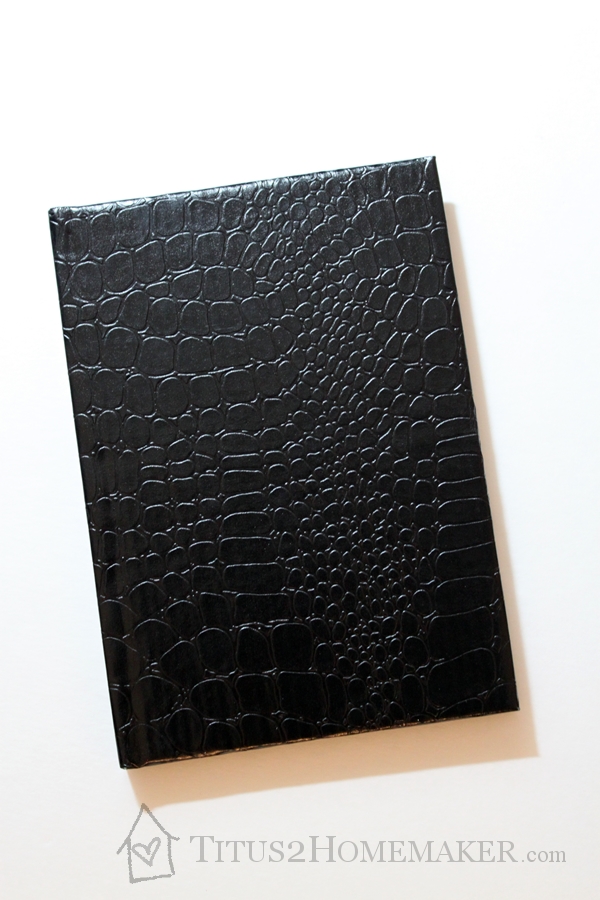
I like the texture of this journal, but the gloss black looks a bit cheap to me. I wasn’t sure what I wanted to do to it exactly, but I wanted something different, while hopefully maintaining most of the texture.
What I did:
Well, this was my biggest fail. I can’t seem to get anything to stick to the glossy cover, so I’m still working on a way to cover up the black without losing all the texture. Even acrylic paint keeps rubbing off. I’ll have to try a primer and see if that works.
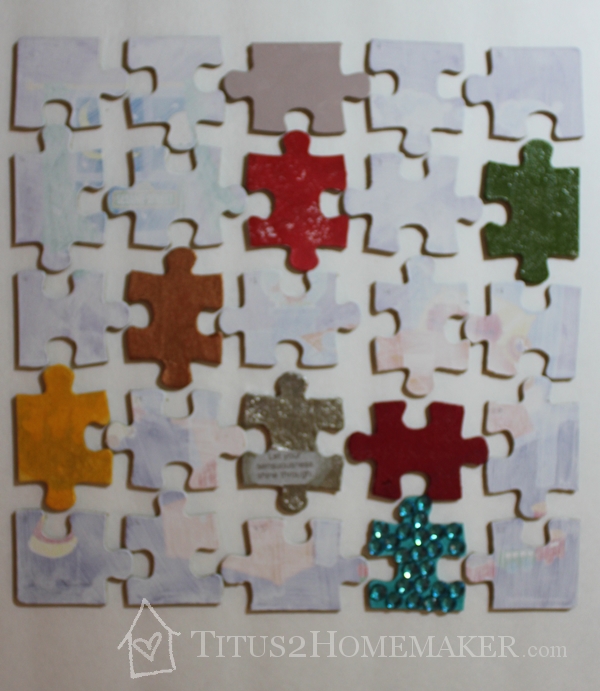
Puzzle

If you look closely, you’ll see that this puzzle says it’s wood. That’s pretty uncommon for a jigsaw puzzle, but it is sturdier than a standard cardboard puzzle. (It’s not much thicker, though. It’s pretty thin wood.) There are a couple obvious options here. You can decoupage a new image over the original to make it personal, but keep it a working puzzle. Or you can use it as the base for an altered puzzle, which is what I opted for here.
What I did:
The first thing I did was open up the puzzle and coat the whole thing with gesso to cover up the original artwork. If you don’t have gesso, white acrylic paint will work, but you’ll probably need more coats because it isn’t as thick. Or you could spray the puzzle with primer.

Once it was dry I separated the pieces and decorated each one individually.
This is actually not finished yet. (And my picture is crazy-blurry. I didn’t realize until after-the-fact; sorry! I’ll have to update once the whole puzzle is finished.) Since an altered puzzle involves lots of mini art projects, this is kind of a lengthy overall project, but you can get a little bit of an idea from this. (Of all the projects in this post, this is the only one I would consider to require any real skill.)
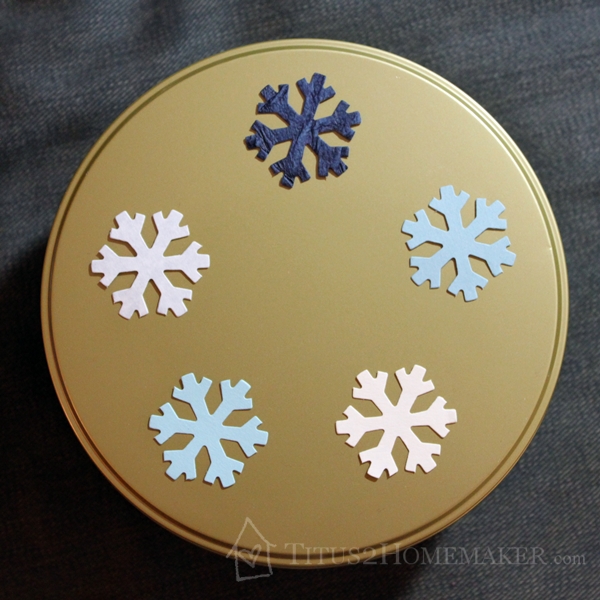
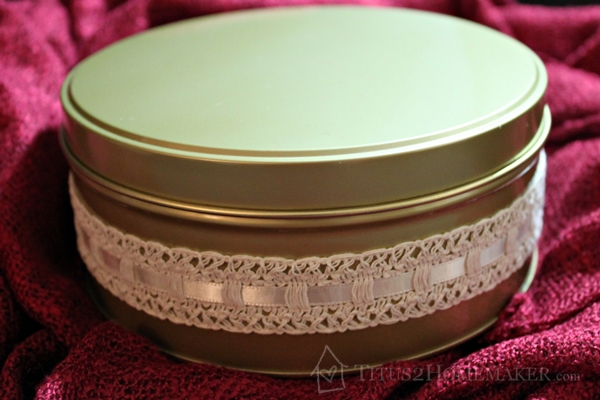
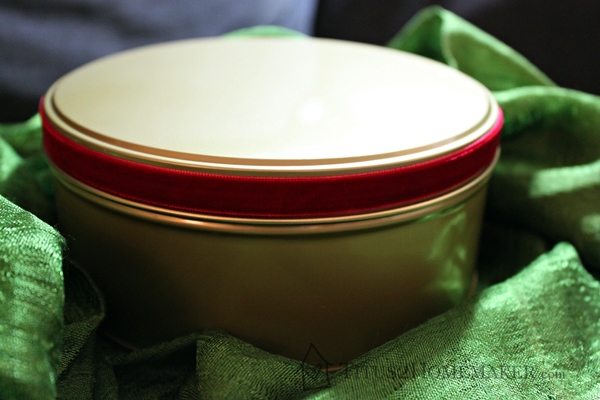
Tin
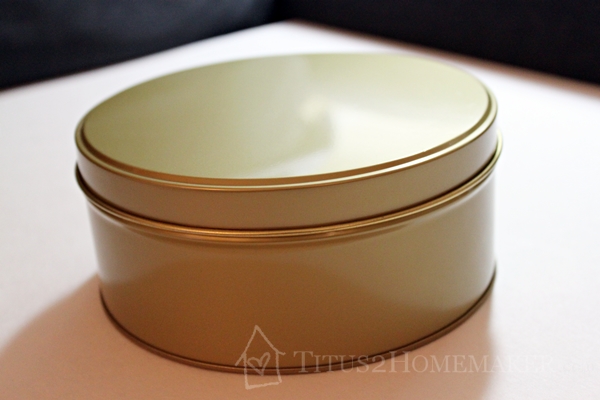
This tin is pretty great because it’s plain. Unlike those cookie tins and the like, where you have to first cover up whatever design is already there. You could use it as-is, but it’s a little boring.
Dolling it up can be pretty easy, though. Wrap a band of ribbon or decorative tape around the tin or around the lid. Tie it up with ribbon. Paint it. Put a doily on top, spray-paint it, and remove the doily. Coat it with glitter or encrust it with “jewels.” Or even just add one fancy decorative sticker right in the middle of the lid. That’s a lot of options!
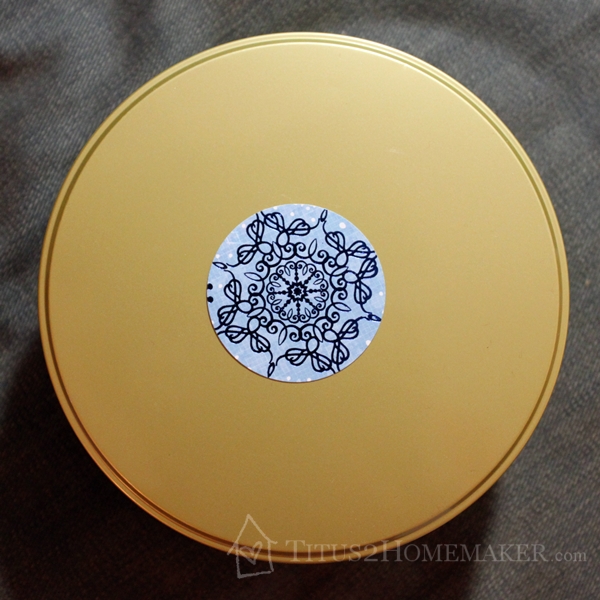
I would probably recommend a larger sticker/medallion than this. (I thought I had one, and I didn’t, so…you get this as an example. I used the largest punch I had.)
Want easy? Check out these two options. These are literally just stuck on with double-sided tape:
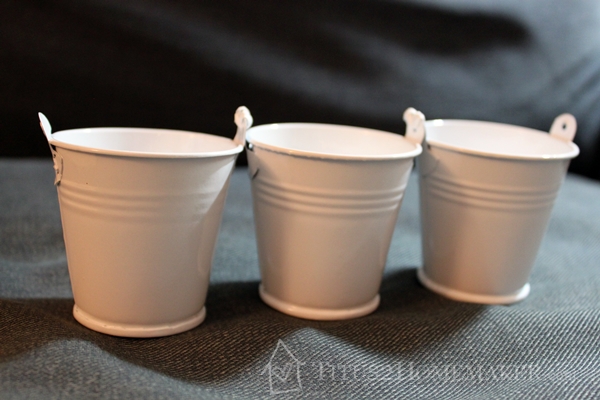
Tin Pails
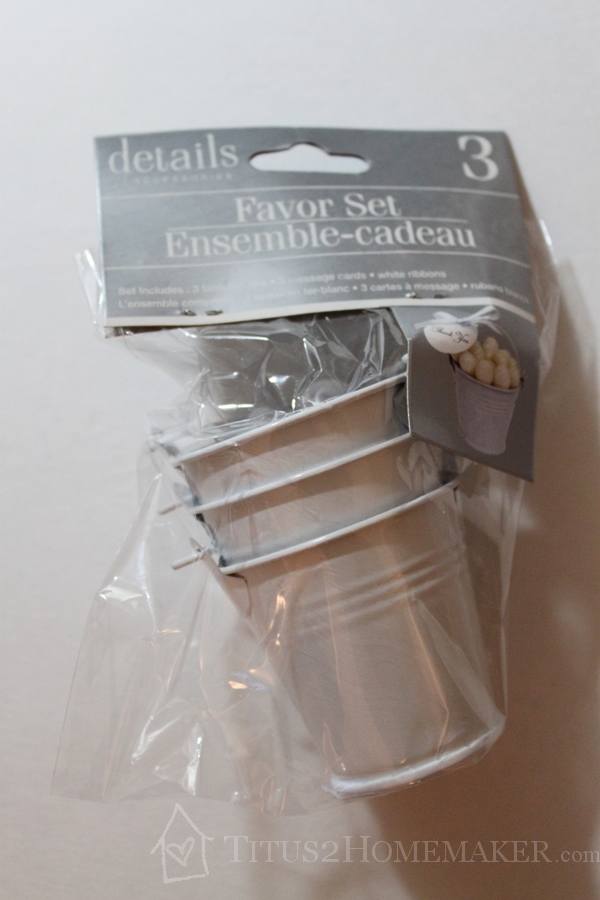
These tiny tin pails came together as a set in the wedding section. They’re designed for favors. I decided to attach them to each other and make a little organizer for tiny items.
What I did:
First I removed the handles. (This is pretty easy; they just pop out.) Then I tied them together with…get this…twist ties. (Yes, really.) I just sort of “knotted” the twist ties through, then twisted them together once and trimmed the ends. (See the pictures if that didn’t make sense.)
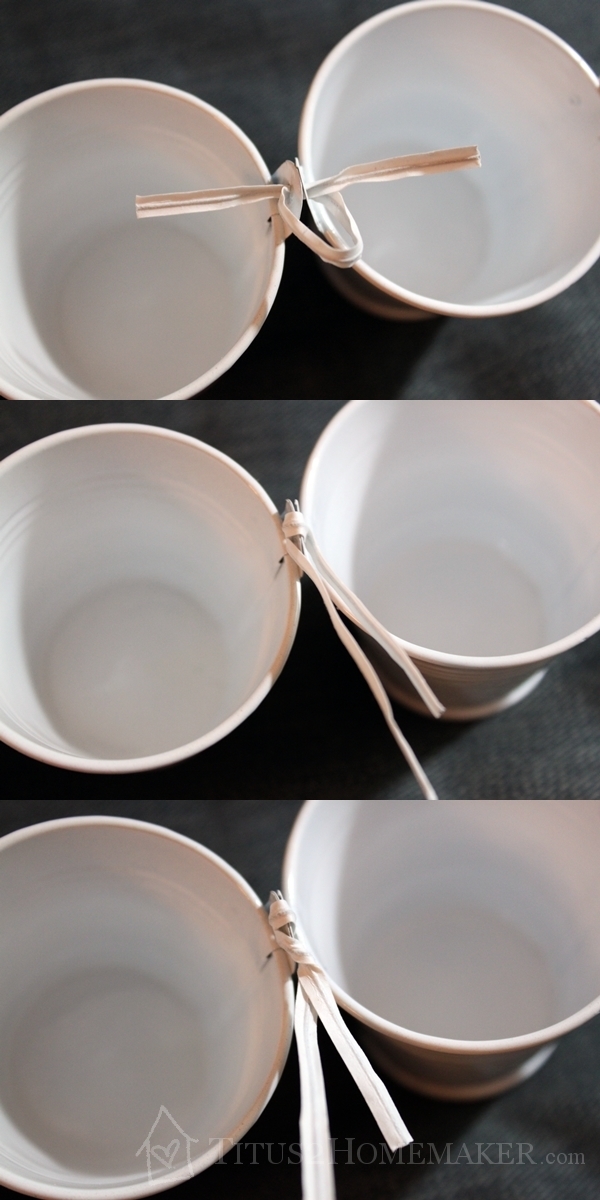
And that’s it. They could definitely be painted or embellished, but right now I’m liking the “clean” look of the white.
Puzzle Tin

This little puzzle came in a tin that reminded me a lot of an Altoid tin. That means it has most of the same potential uses. (It’s a little larger than an Altoid tin, though, and the lid isn’t hinged; it’s totally separate.) If you’re ambitious, use the puzzle inside — or its individual pieces — for other projects. Since this one is princess-y, I’ll probably just let my kids use it for its originally-intended purpose.

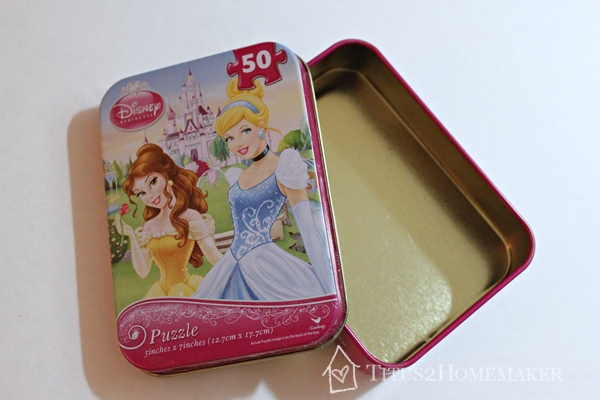
Then decorate the tin. If I were being really ambitious, I’d prime and/or paint the whole exterior of the tin, or remove all the paint with acetone. But I didn’t want to go with ambitious; I wanted to go with quick and easy.
What I did:
So for the sake of simplicity I left the pink edges alone, and chose to paint only the top surface of the tin with nail polish. (I had some on hand in the craft bins, but you could grab this from the dollar store, too, if you need to pick some up for the project.)
Then it can be put to all kinds of uses!
As it turns out, I needed to have either primed the lid or chosen a more opaque nail polish. It didn’t work so well, either, because even after multiple coats, the polish was still too sheer.
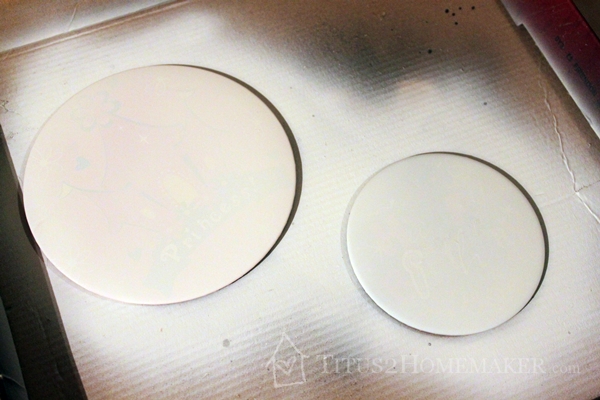
Buttons
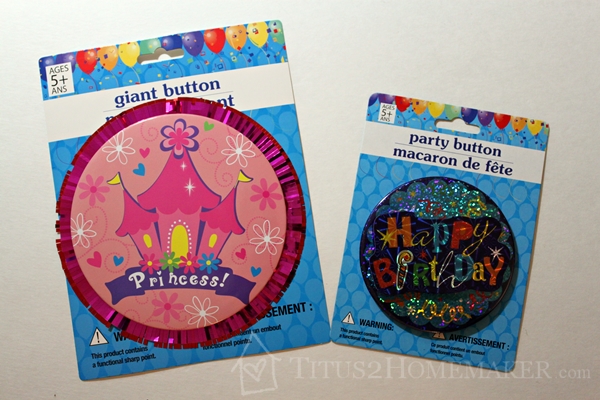
I didn’t do anything shocking with these. They’re buttons. I left them as buttons. But I didn’t really need “happy birthday” or “princess” buttons, so I decided to make them more useful.
What I did:
First I removed the embellishments. The “happy birthday” thing was a little tricky to get off. It was stuck on with that double-sided foam tape and it’s some pretty heavy-duty adhesive. I never did get the adhesive quite all the way off, so the surface of that section of the button is a little irregular. The frilly stuff around the edges of the giant princess button came off pretty easily, and I set that aside to use on a card or something later.
Then I spray-painted them with cheap white spray paint to give me a “blank slate” to work with.
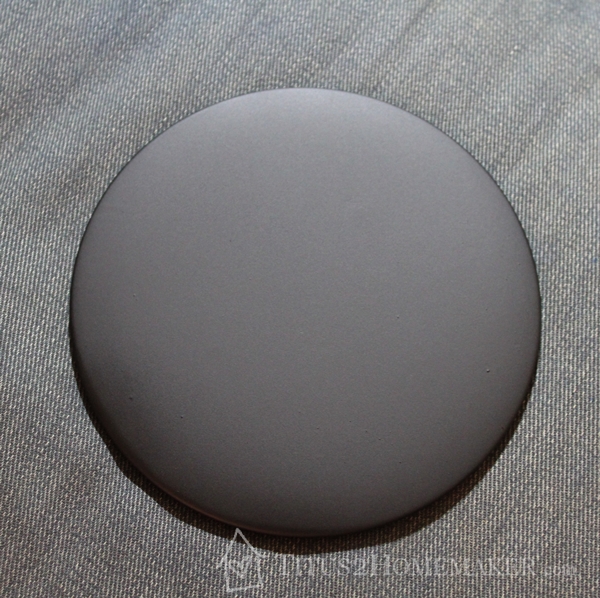
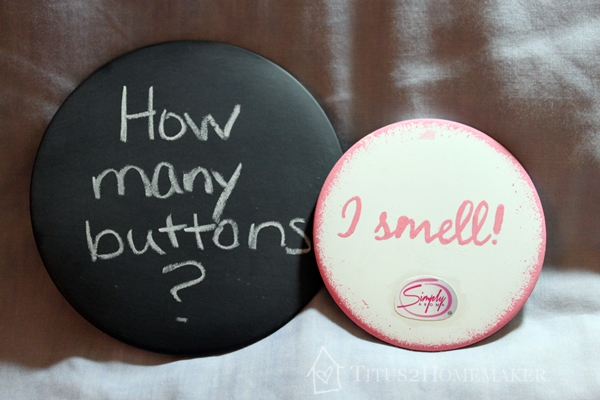
The big button is so big it seemed almost a shame to “waste” it on just one message — so I opted not to. I sprayed it with chalkboard paint so I can switch out the message on it.
The smaller one I decided to put a silly message on — a play on words for my essential oil business.
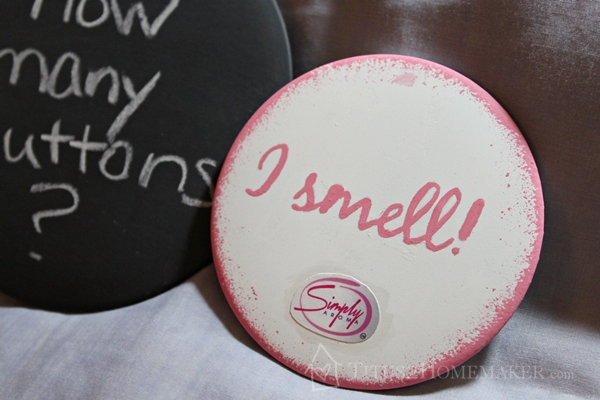
There’s a little trick I used when painting the smaller one. Turn a pencil sort of on its side and scribble all over a piece of paper to coat it with graphite.
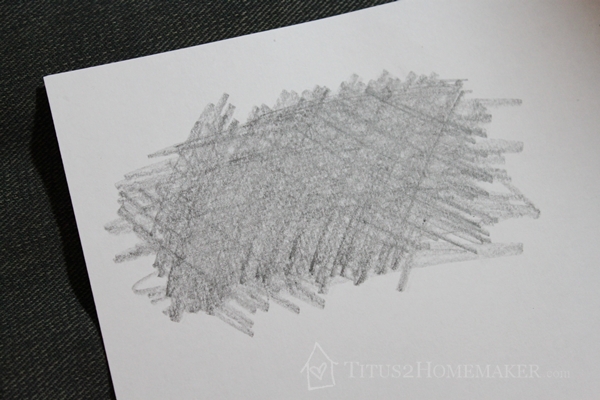
Then turn this paper so the graphite faces the thing you’re doing your art on (in this case, my button). Then trace over the shape(s) you want, pressing firmly so it will transfer the image. I printed my words out on another sheet of paper, then traced them with a ballpoint pen.
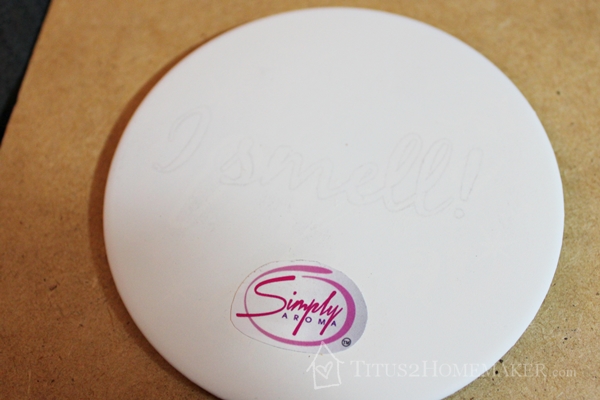
It’s pretty light, but I think you can make it out in the picture. Then I was able to use these outlines to paint it. (The logo was just Mod Podged on from a brochure, and the edges of the button were sponged to add a little color.
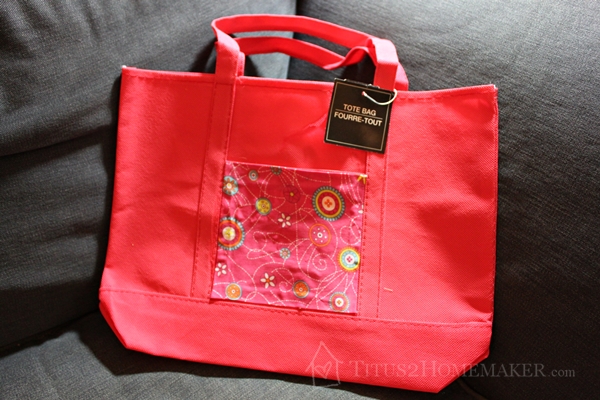
Tote
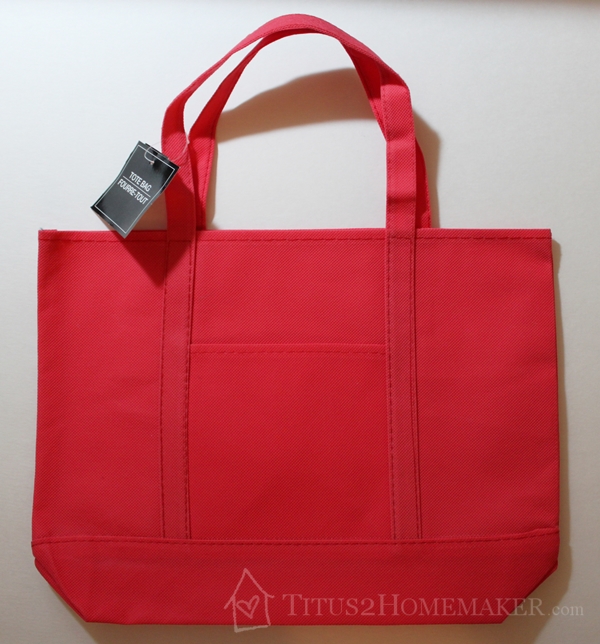
This tote is okay, but it’s kind of chintzy material and definitely boring. I like the color, but the boring look makes the cheap-y fabric more notable. I thought it would be pretty simple to dress up just by adding a little bit of a print.
What I did:
This was another fail, but only because I didn’t plan ahead properly. I planned to add some visual interest by using Stitch Witchery to adhere a piece of patterned fabric to the little pocket area in the center. But I didn’t think, ahead of time, about the fact that it’s synthetic and would, therefore, melt.
I did remember before I actually did it, but I still didn’t manage to avoid “hitting” the rest of the tote with the iron. If you have one of those mini craft irons, this would probably still work okay (just make sure you’re only ironing one side of the tote so it doesn’t melt shut). Otherwise, you’re probably better off looking for a mostly cotton bag.
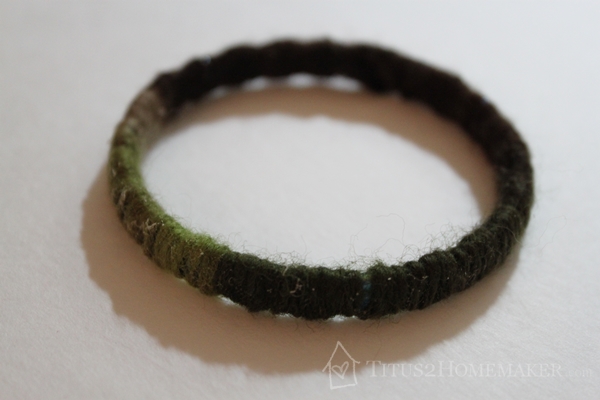
Bracelets

These are crazy-cheap bracelets. They’re 6 to a pack, meant as children’s party favors. Now, if you have big hands, these might not work well for you, but I have small hands and pretty tiny wrists, so they’re a great size for me. But…they look cheap and ugly. Cheap and ugly isn’t too important, though, if all you need them for is “bones.”
What I did:
Pretty simple: I ran a bead of Tacky Glue around the bracelet and wrapped it with yarn. In hindsight, I should have run the glue around the inside rather than the outside (it looks a bit “glue-y”). Given the scallopy edges of this bracelet, something wider (like a ribbon) or stiffer might have worked even better. The yarn wanted to slip down into the narrow parts of the scallops and gap a bit. I still like this bracelet, but I’m confident I’ll like the next one even better, after learning from this one.
Towels/Placemat
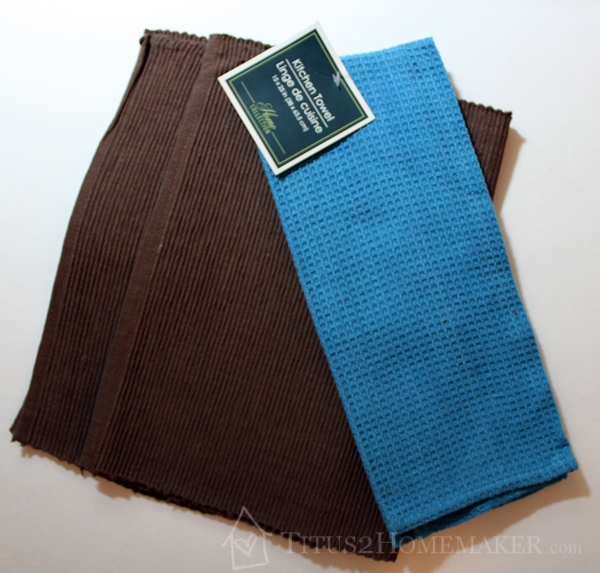
I got these because I liked the colors and texture. I cheated a bit here because I haven’t used these yet! But I’ve used a similar item (to the brown) in the past. The brown is two matching placemats. They’re ridged and a bit sturdy. The teal is just a waffle weave kitchen towel.
I haven’t decided yet what to use the placemats for, but I used an almost-identical placemat in cream before to make a cover for my Day-Timer. It was sturdy-but-flexible fabric and I liked the texture just like I like these. I just sewed in the pockets I needed and added contrasting trim. (I used that cover for years!) So I confess, I’m temporarily hoarding my textured brown “fabric” until I decide on something “special” to make with it, but here’s an idea for you of what one could do with it.

The teal towel will probably become a scrunchie and…I’m not sure what else.
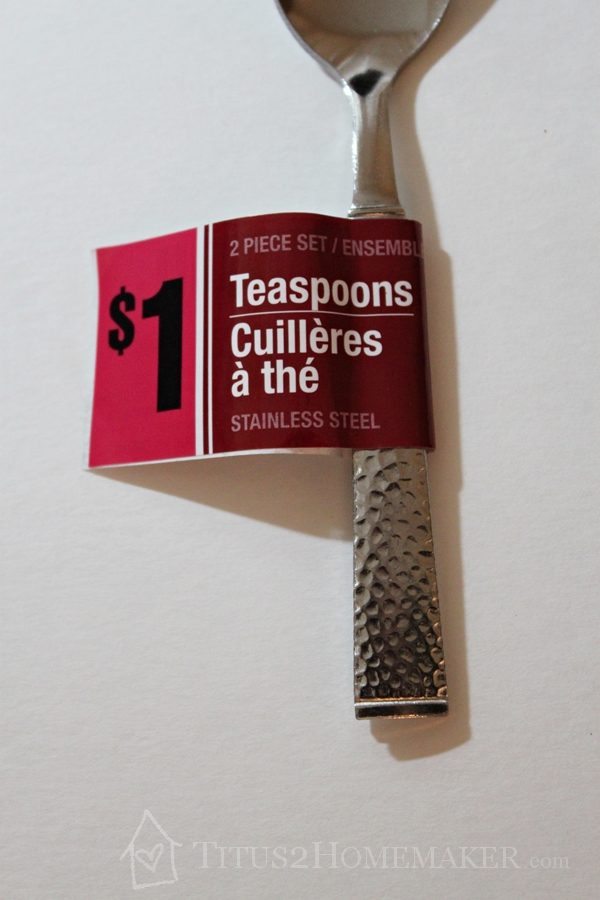
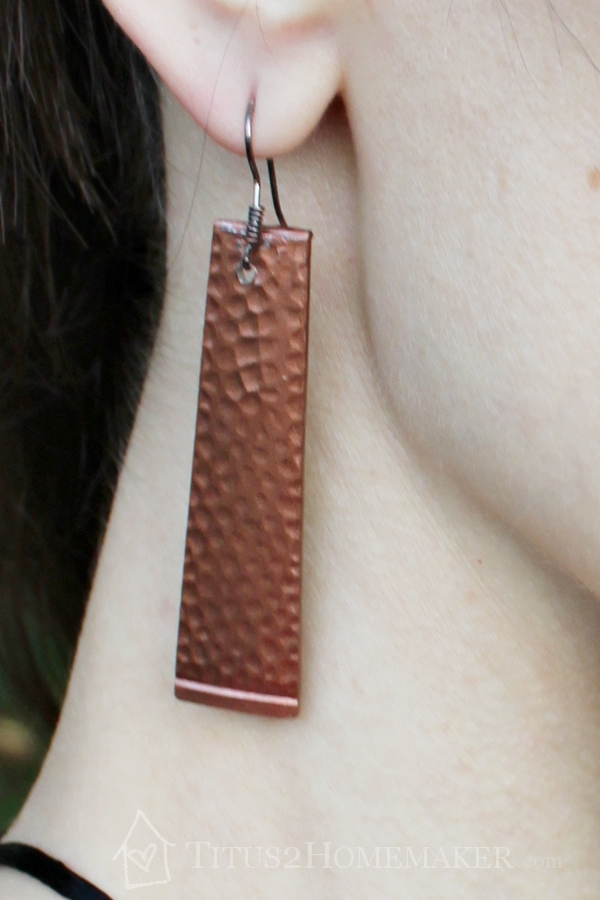
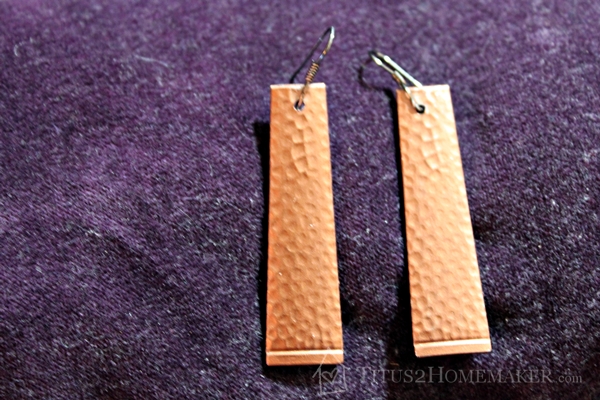
Spoons
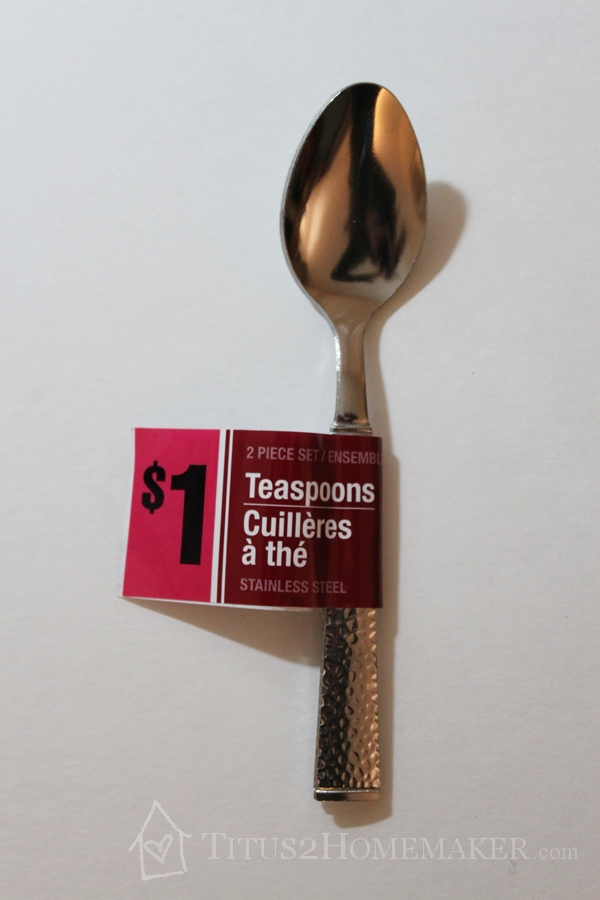
Here’s a project I’m pretty excited about. It’s not super-complicated, but it’s a bit more labor-intensive than most of the other projects. And took a bit more creativity. That’s why I’m excited about it, though. I’m not usually very good at looking at an item and “seeing” something totally different, but that’s exactly what happened here. I fell in love with the texture and design of the handles on this pair of spoons and immediately envisioned earrings.
What I did:
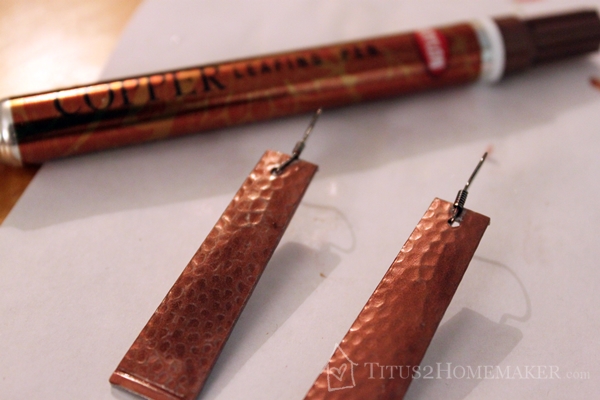
Cut the handles off the spoons. I did not cut the entire textured section off. I didn’t want them to be that long, because I felt they’d look too much like “straight lines” then. I cut them probably 2/3 of the way up that section, so they’re a bit more of a straight-ish wedge shape. I had a hard time holding the spoons still enough to cut them with the hacksaw, so once I had enough of a cut, I just bent them backward and snapped them off.
Then I drilled holes near the top with a cobalt drill bit. (That’s good and hard, for metal. The link goes to the exact drill bit I used.) This was kind of tough, too, and one of my holes is off-kilter. Oh, well. I rather hope no one besides my husband is looking that closely at my ears! After this cutting and drilling, I needed to file down the rough edges so I wouldn’t cut up my ears.
If you like the silver, you can just add earring hooks now and be done with it. (If you’re feeling really lazy, just stick a pair of stud earrings through the holes.) I wanted them another color, so I painted them first, then added the hooks.
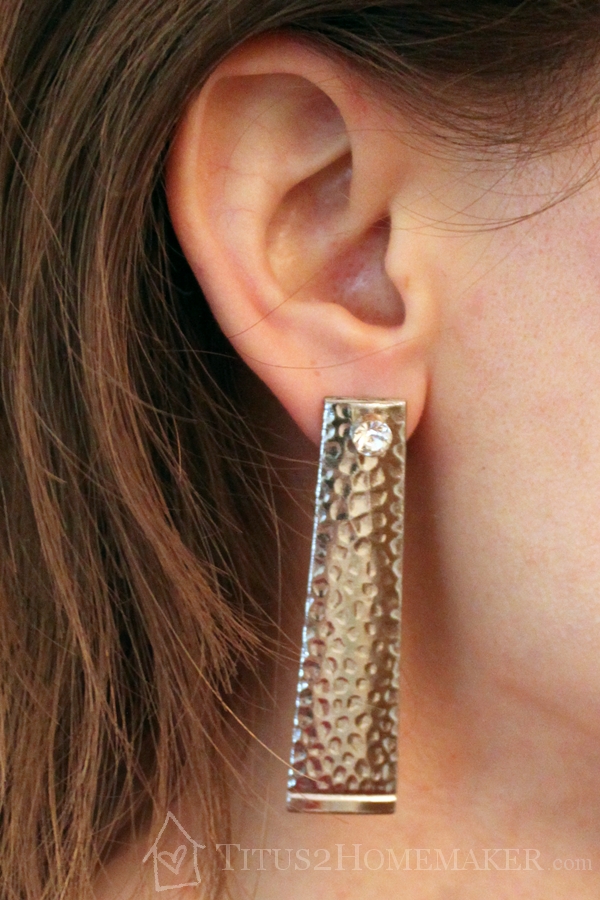
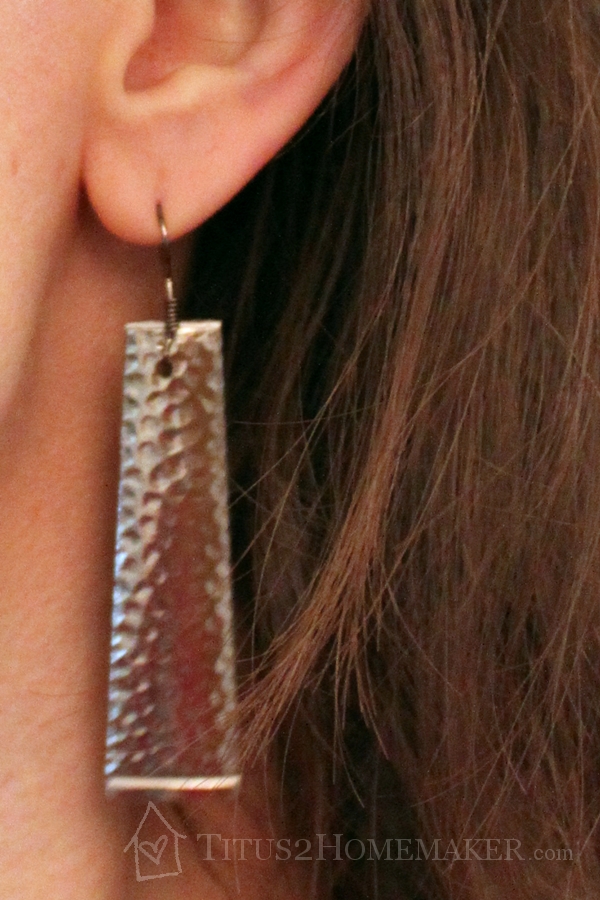
If you’re feeling really ambitious, you could add beads or some other embellishments to make more multi-layered earrings, but I was happy with these even as they are, in all their simplicity.
And now I have the top halves of the spoons left that I can do something with.
Pin It:

[…] Mascara Day 21: DIY Birthing? Day 22: DIY in Minutes {Roundup} Day 23: DIY Homeschooling Day 24: DIY Dollar Store Redos Day 25: DIY Reconsidered (Or, When Not to […]