The Problem (i.e. The Mess)
My baking cupboard — or, rather, cupboards — were in desperate need of reorganization. They actually weren’t horribly disorganized in the first place. But they weren’t making sufficient use of the space. Because I cook with whole foods (including unusual grains, etc.), and especially since going gluten-free, I have a pretty wide variety of starches, gums, flours, etc. I had started out with items organized in matching mayonnaise jars like this:
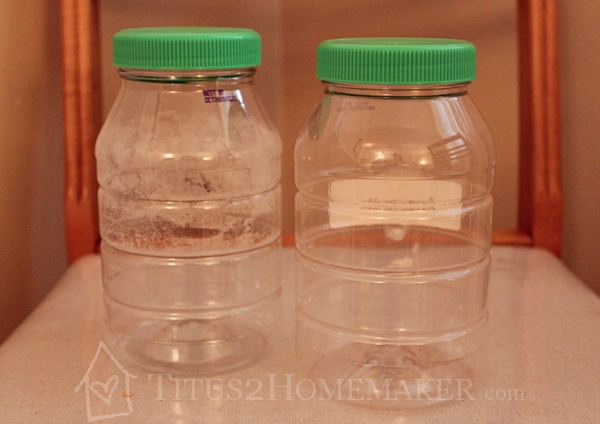
So they had a pretty consistent appearance. But the round containers didn’t make good use of the horizontal space and they couldn’t effectively be stacked, so I had wasted space at the top of each shelf. This meant that as I’d gotten a few new packages of various things, they’d just gotten stuffed into the spaces I could fit them in. And I had lots of little loose jars/bottles of things like liquid stevia. (Unfortunately, when my new containers came, I was so eager to get started that I forgot to verify that I’d taken a “before” photo. Which, apparently, I hadn’t.)
The Solution
I wanted containers that were rectangular and stackable, to make the most efficient use of my space. And they had to be (reasonably) affordable. I was willing to make an initial investment, but didn’t want to have to sell my firstborn for them. 😉 I settled on these modular containers by Rubbermaid.
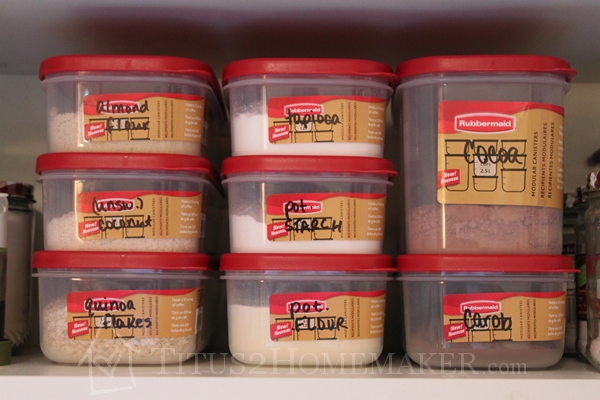
They come in four sizes, I think. What you see are the two smallest. They all use the same lids, so you don’t have to try to figure out what goes to what. They’re BPA-free. (At least I think I remember reading that. I’d be slightly pickier if these weren’t all dry goods. But all-glass is not in my budget.)
Two bummers:
1) They only come with red lids. Since mine are in a cabinet (and red is one of my kitchen colors) that’s not a big deal for me, but if your kitchen isn’t red and you want them on an exposed shelf, it might be disappointing to not have a more neutral option.
2) This is as small as they come. You’ll see a little later that I chose to keep some of my baking supplies in jars, because these containers were just simply overkill for things like baking powder and salt. I wish they had one size smaller.
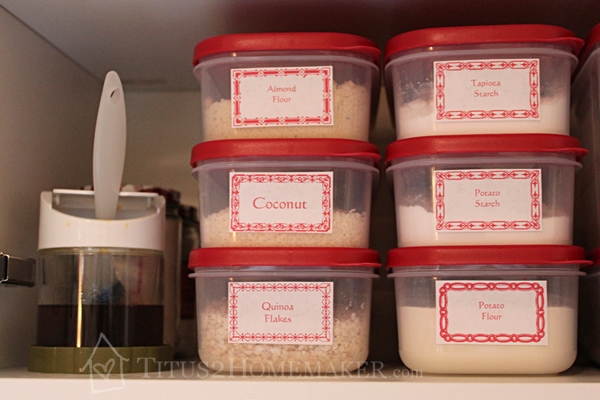
But I like that I can see the contents. They stack beautifully and make great use of the space. And there are actually markings on the sides of the containers (I don’t know if they show up well in any of the pictures or not) so you can see how low you’re getting.
The “After” Shots
So this is what I ended up with:
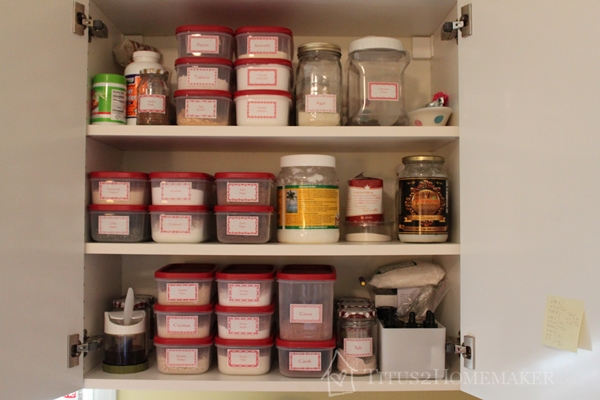
There are still a few aberrations here. I have three jars of coconut oil, and an extra bag of (some weirdly desiccated/defatted) shredded coconut, because when this stuff was a mess, and/or from having a few things still packed, I didn’t realize I had some, and duplicated. They will “go away” as I use them up. Also, the agar on the top shelf really needs to go in a smaller jar, but I’m out of matching jars — need to buy another jar of Smucker’s peanut butter so I have a match! (And you can see a sticky note I had stuck to the inside of the cupboard with my shelf measurements!)

(That container on the far left is an oil/lecithin mixture I use for greasing baking dishes. It’s sitting in a mayonnaise lid so that when it inevitably slops it doesn’t make the shelf sticky/slimy/greasy, and it has a basting brush in it.)
The box on the right is holding all the little jars of liquid stevia, vanilla, etc. (I think the box is from IKEA, but I’ve had it for a while, so I couldn’t swear to that.)
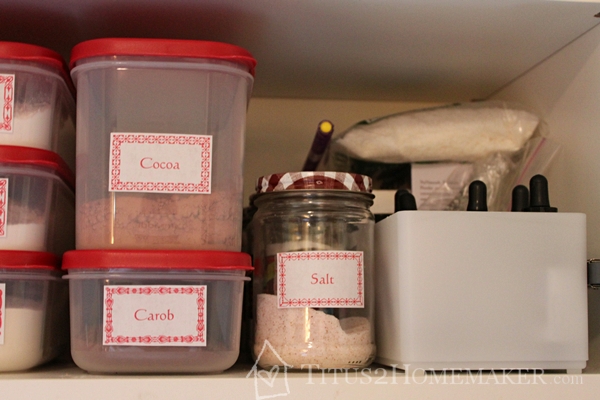
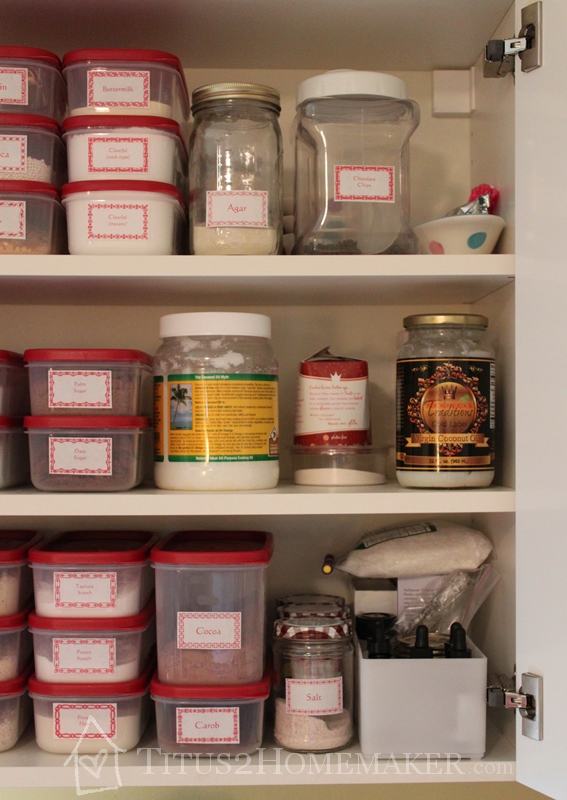
Zoomed in a little closer so you can see my Smucker’s jars. 😉
And get a better view of the modular containers and the lecithin/oil jar.
I saved so much space that the lower cupboard (which was packed full, and not having very good use made of it) is actually about half-empty. Most of the space is at the back, so it’s not obvious, but look how much space I saved:

(And I may eventually get more modular containers for the other sweeteners there – almost everything on that bottom shelf is sweeteners – but for now I have those in containers that are doing the job, so the added investment can wait. When I do get matching containers for them, I should save even more space!)
The Labels
And what are those lovely red labels I’m using? I’m glad you asked! Or assuming you were going to ask, anyway. 😉 I got these vintage-style labels from Just Something I Made,where they were a free download, but that site is no longer online. 🙁 I printed them onto sheets of label paper (not cut out labels — just sheets of label paper). But I didn’t want to print out these lovely labels and then hand-scrawl the actual names on them. So I made a template in Word.
If you’d like to use it, you will find it below. Just print the labels onto label paper. Then put the sheet back in the printer, and print only the first page of the Word document (that you’ve edited with your necessary titles, of course). Click on the thumbnail below to download the file.
The one downside is that the label paper isn’t waterproof, so they’ll be a mess if I wash them. I might have done well to use wateproof labels like this, but I was using what I had — and this is what I had. (I wonder if I could put clear waterproof labels over these, and protect them?)
Here’s the download:
Shared at Finer Things Friday. Tackle It Tuesday.
Leave a Reply