
One of the goals for my 101 Things in 1001 Days list is to make use of a new technique from my “techniques for making stuff” Pitnerest board. To begin with, I thought that rather than one artsy technique, I’d try out some methods for removing all the “stuff” from old containers, so I have some methods in my repertoire for preparing them to be reused.
In this post you’ll see that I’ve tackled two big problems: ugly print on plastic containers and stubborn label glue on glass jars.
Removing the Print from Plastic Containers
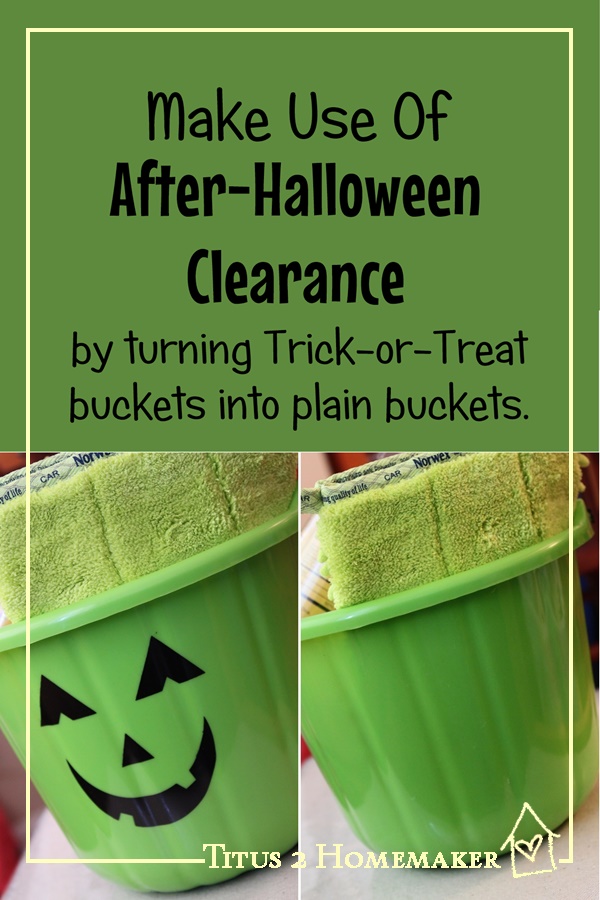
Thanks to this pin and this pin, I learned how to remove the print from plastic containers. This can be pretty cool because, as you’ll see, it’s a pretty frugal trick! My daughters wanted to know why, since we don’t celebrate Halloween, did I purchase this bucket:
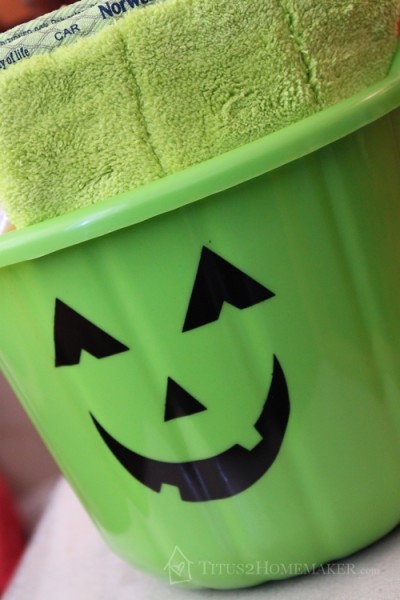
Well, because it cost a whopping 50 cents on clearance after Halloween and I knew I could turn it into this!

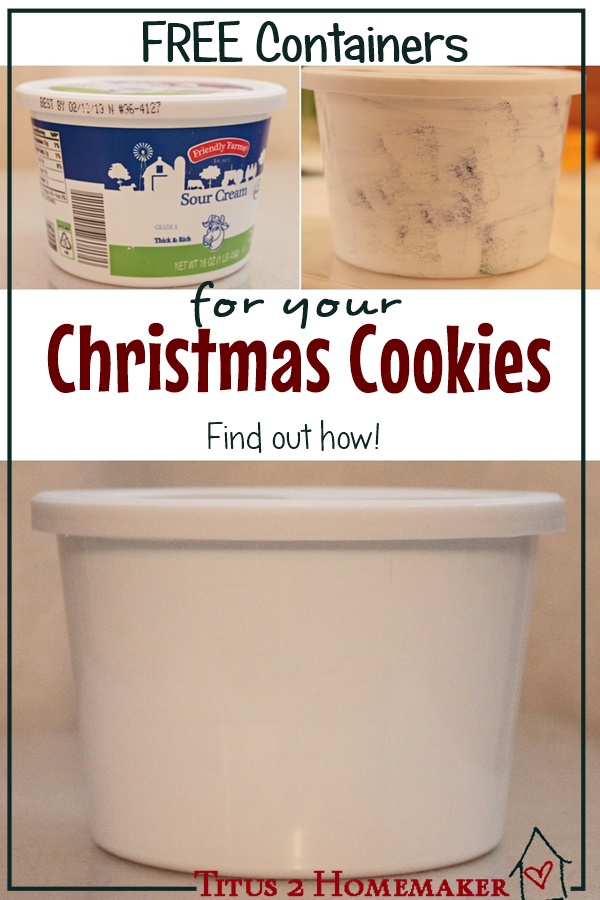
(You see it here filled with car care supplies. It was a Christmas gift. The whole thing, not just the 50-cent bucket!)
The trick? Acetone. Now, acetone is the primary component in old-style fingernail polish remover. (You know, the harsh stuff. The slightly-gentler stuff you can buy nowadays says “acetone-free,” although you can still buy the other kind.) Depending on the ink, this might work. If you already have it in the house, it’s worth a try.
But what you really want is “pure” acetone. You’ll find it in exactly the same place – with the fingernail polish remover. I got mine at Walgreens, but if you can’t find it at the drugstore, you should be able to find it at a beauty supply store. (I think manicurists use it to dissolve nail glue. But I don’t do nails, so I’m not sure.)
This stuff is hard on your hands, and it really stinks, so I recommend a) doing this outside if you can (or at least open a window) and b) saving up all of your containers and doing one big batch so you don’t have to do it very often. If you have rubber gloves, they could be helpful.
Anyway, once you have your acetone, this is not complicated. Grab your container:
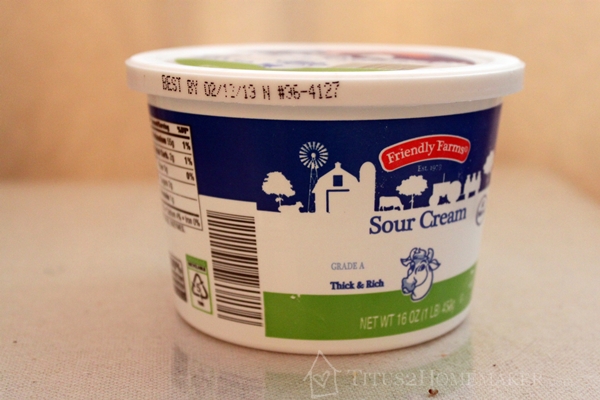
Get an old rag, wet it with the acetone, and start rubbing the ink off. At first it will probably take a couple seconds for the ink to begin to dissolve, and then it will start rubbing off. I found that I really needed to do mine in two “stages.” First the ink all dissolved and some of it rubbed off, so it looked like this:
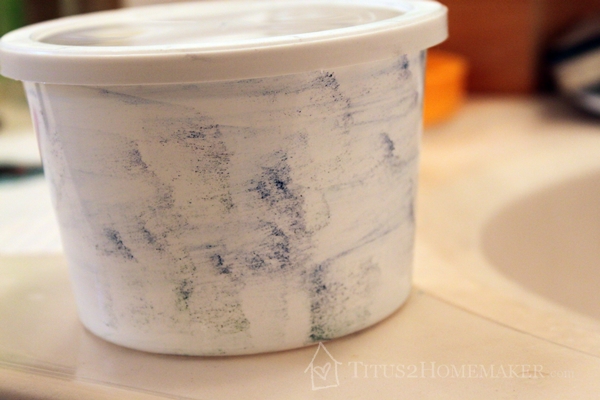
But there was so much ink that then a lot of it was just smearing around. So I needed to get a fresh section of the rag wet and clean it again. At which point I had this:

Now, mine has a little bit of blue still shadowing it. I think that’s because I put the container down, went and washed and dried my hands, and photographed the container before I scrubbed it down the second time, giving all that pigment time to “set,” and it stained a little bit. If I’d just moved straight on to the second “coat,” I don’t think it would have done that. Even as it is, though, you wouldn’t notice if you weren’t inspecting it.
Removing the Glue from Glass Jars
But maybe the containers you have to work with aren’t plastic. Maybe they’re glass jars, and you need to remove the labels. You can get the labels off, but then that pesky, ridiculously-permanent glue is still there! Well, try this.
First of all, you’ll want to remove as much of the label as you can. Some of them are only glued down in one spot and you can just tear them off. If that’s not the case, you have a few options. 1) Soak the jar and peel the label off while it’s good and wet. 2) Apply some heat to them.
Chances are, you’re going to have some glue left. We’re going to get it off using the method suggested here and here. Oil and baking soda. (Much friendlier to the skin and lungs than the acetone thing.)
Now, I wanted to put this to an extra test, so I didn’t even soak this label off like I normally would have. I just tore off what I could get off, which wasn’t particularly impressive. (It basically was just the outer layer.) So I was starting with this…

Now mix oil and baking soda to form an oily paste. It’s about half and half, but I didn’t measure – just eyeballed it. Using your fingers, rub that paste all over the label area, and let it sit for about ten minutes. (I didn’t time it, either. This is so not an exact science.) When the ten minutes are up, wash the paste off. (As in, wash the jar like you would wash a dish, with soap, etc.) Because I started with all this extra residue, I still had the gluey stuff left at this point.
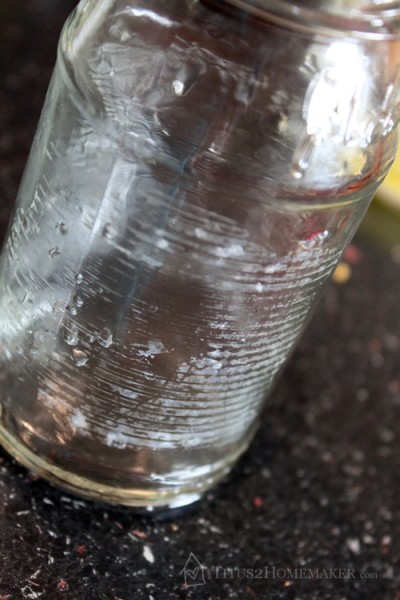
(Ordinarily, this is what I would have started with, if I’d just soaked the label off first.) So I just did it again. Used my fingers to rub the paste into the residue areas, then let it sit for around 10 minutes. And washed it off. When I washed it, it took a little bit of light scrubbing. Like what you’d need for washing a dish with some food on it, not like scrubbing hardened concrete off or anything! And I was left with this. (Which is beautifully clean, but I didn’t bother to dry it, so it’s still covered with water droplets.)
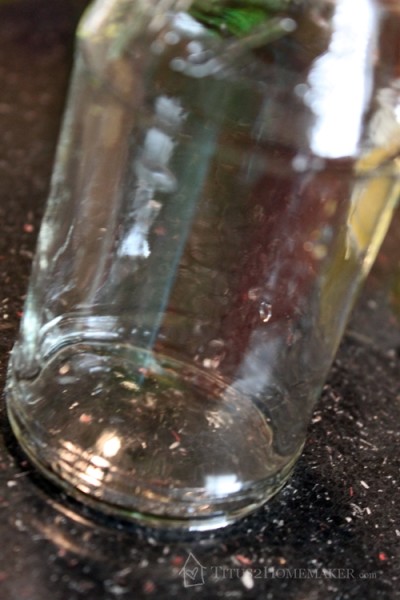
(Also, I don’t know what that reflection is at the top area. The side of the jar that’s toward the camera is the side that had the label on it, and it’s completely smooth.)
So there you go: how to prepare plastic containers or glass jars for reuse.
This post is being shared at the PinChallenge linkup, Get Inspired.
Leaves, yup green leaves the laegrr and thicker the better.I am in Vietnam at the moment and there are a few food products that are sold on the streets and in the markets and they are wrapped in leaves.Why leaves, the leaves they use a very large plant leaves from sugarcane plansts etc but it would work with large leaves anyware,lettuce leaves large cauliflower leaves etc.The trick with this is a leaf will normally not let anything pass through it and is designed to transport rainwater to the central roots of the plant. However if you wrap food in the leef once it has been cut from the plant it will loose moisture as it is not fed by the roots anymore.With this loss of moisture the leef will contract and if you have wrapped the food and bound the leef correctly you are infact creating a vacuum seal on your food.