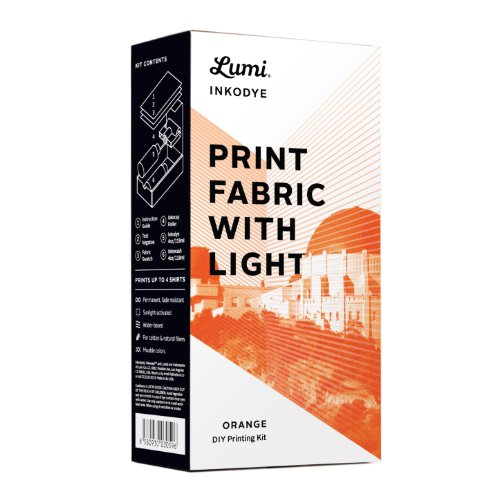
Thank you to Lumi for providing a Print Fabric with Dye kit to facilitate this review/tutorial.

When I was a little girl, I enjoyed making sun prints. We’d get a special light-sensitive blue paper, and I would put objects on top of it to expose to the sunlight. The exposed portion turned white, leaving the covered-up portions blue.
Lumi has created a fabric dye based on the same concept! You spread the dye on the fabric, cover it with your design and expose it to light, then wash it with their special wash to set the print. You can use miscellaneous objects like I did when I was little – paper clips, leaves, etc. Or you can make complex designs by printing an image on a transparency and using that.


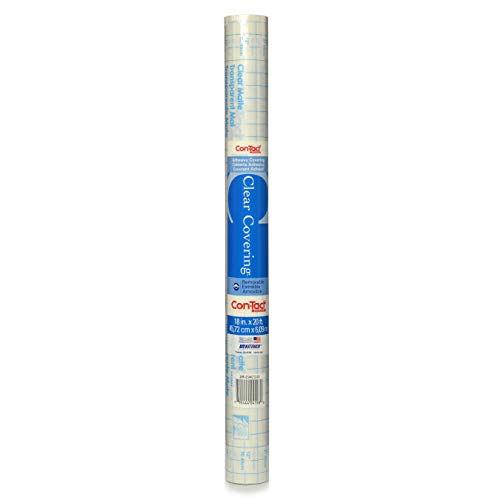
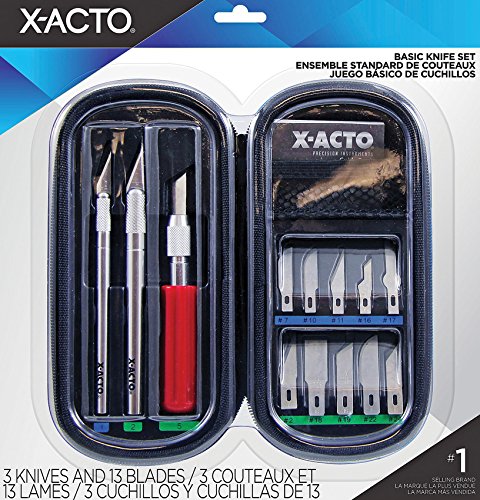
I didn’t have a transparency, and I was too lazy to go out, so I did mine the hard way. (Isn’t that great? I did it the hard way because I was lazy! It didn’t involve four children, carseats, and the store, though.) To do it my way, you’ll need your image (printed out), a craft knife and a mat to cut on, and unless your image is all in a single piece, clear shelf paper. (Of course, you need the Lumi Inkodye kit, too, along with something to print on.)


![]()

Step 1: Use the craft knife to carefully cut out your image. I used a printout of my daughter’s artwork.
This was a little tedious, but not difficult.
Step 2: If your image is like mine (and most), you will now have several pieces. You don’t want to have to try to keep them all in place individually while your shirt (or whatever) is exposing. So you’re going to use shelf paper to hold it together. Cut two pieces of clear shelf paper a little larger than your image.
Carefully peel the backing off of the first piece of shelf paper. Gently and carefully put each piece of the image in place on the sticky side, and smooth it down. Then carefully peel the backing off the second piece of shelf paper and place it (sticky side to sticky side) on the first piece to seal everything in.
This is going to be your “transparency.”
Step 3: On a dry, sunny day, go outside with your “transparency,” the Inkodye kit, and your shirt (or tote or fabric or whatever it is you’re going to print). If it’s a crazy windy day like it was when I printed mine, take an armload of canned goods, too. 🙂 If you’re using a shirt, you will probably want a piece of cardboard or waxed paper or something to put between the layers, too.

Step 4: Get everything set up. If your item to be printed is two layers thick, put something between the layers so the ink doesn’t bleed. Then attach the brayer to the ink bottle and roll the ink all over the section to be printed. Lay the “transparency” on top. If it’s windy, use canned tomatoes and chiles to hold down the corners of the transparency and the shirt!
Step 5: Wait. The image needs to expose for about half an hour. At the end of this time, gather everything up (be careful not to get the dye on you – it’s dye, so obviously it will stain!) and toss the printed item into the wash (by itself – not with your regular laundry!) with the appropriate amount of Lumi wash as indicated on the bottle.

Enjoy your print!
Leave a Reply