 We have tons of home video from the past couple years. In fact, our video camera was full, and we couldn’t take any more video without clearing it off. But I was slow about removing it from the camera because I wanted to be able to edit it before saving it. (No point taking up vast amounts of disk space with the “junk” video bits.) Have you ever used video-editing software, though? Most of it is either crazy-hard to figure out, or won’t do much.
Having used CyberLink’s PhotoDirector (for photo management), I knew that they’re good at creating software that’s powerful, but user-friendly and fairly intuitive. So I decided to give PowerDirector a try. CyberLink was gracious enough to provide me with a copy of PowerDirector Ultra 11 so I could check it out and write this review for you.
It is powerful software. Unfortunately, it isn’t as intuitive as I had hoped. I’ve been working with it (between dealing with sick kids, hubby, and me) for several months now, and I still haven’t quite figured out how to do all that I’d like to be able to do — like add titles. I used it to edit the video for this post together, but had to add the caption that shows up midway through after uploading it to YouTube. (Don’t judge the software’s ability by my ability, though. I’m pretty new to videotaping and editing, so I’m sure the quality of my video isn’t terribly impressive.)
Using PowerDirector
When you first load it up, you’re given a couple basic options. You can choose the aspect ratio for your video (16:4 or 4:3), and you can choose whether you want the easy editor or the full editor. I wish there were tool tips for the aspect ratio, to help advise you which one to choose. 16:4 is a standard widescreen setting for a television. I think 4:3 usually works better for the computer. Also, your video camera probably defaults to capturing the video in 4:3.

The Easy Editor/Magic Movie Wizard
If you choose the quick editor, it’s a pretty quick-and-simple process. You don’t have to do much at all. But you can’t do much, either, so if your video needs a lot of editing (junk clipped out, etc.), it’s not your best bet. When you start it up, the first step is to import your media.

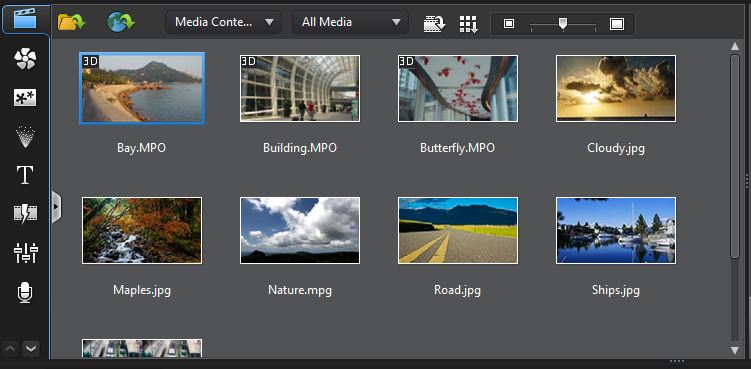
Click on the little file folder button to choose individual media files or whole media folders. They’ll get dropped into the pane that’s currently empty in this screenshot. Then click next…

…and you can choose your video’s style. There are four pre-loaded in this edition. Just click one and go on.
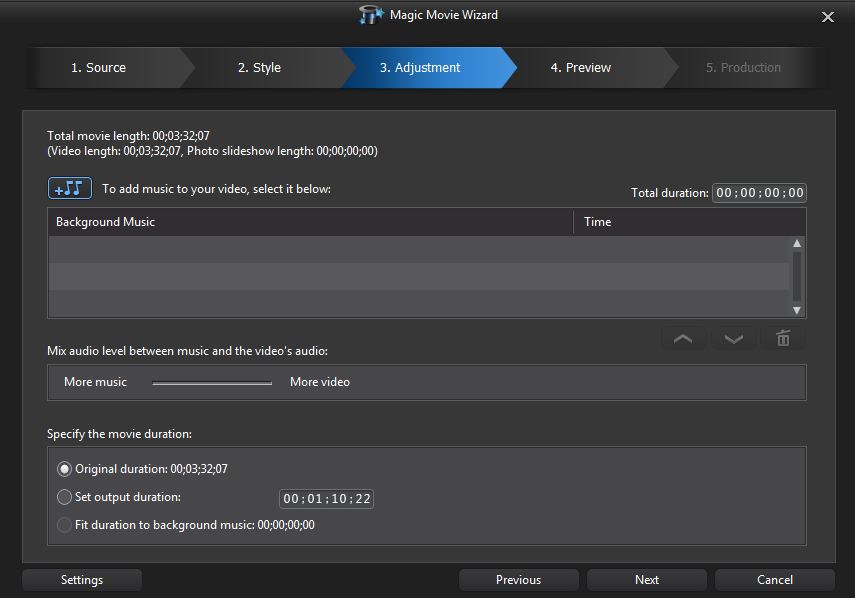
The next screen lets you choose your background music and set the video’s duration.
Then you’ll go on to the preview, which builds your video, compiling all of the components. (Be patient, ’cause even with a short video, this can take a while.)

If you like it, you can choose to “produce” it (output to file or upload it), create a disc, or go on to the advanced editor.

Of course, unless your videography skills are completely amazing and you don’t have to edit anything out, this particular setting won’t be very helpful unless you’re going on to the advanced editor, anyway. It’s probably a better option when you’re working primarily with photographs, rather than video clips.
The Full Editor
If you want to do more extensive and/or specific editing, you’ll need to use the full editor. This is where I ran into some frustration with the interface. In some instances, I found the interface very…particular. The workings aren’t complicated, but I didn’t always find them to be obvious, either. I intuitively want to drag transitions to the “joins” between two clips. You can’t do that. You have to drag them to the clips themselves. But first you have to have selected the clip. It’s as easy as drag-and-drop, but it took me a lot of trial-and-error (and a good bit of frustration) to figure out how to do it.

If you want to increase the length of the transition…well, good luck. You’re supposed to be able to just select these and drag them wider, as well, but I found it very, very tricky to get the exact right spot selected so I was dragging the right thing.
I still haven’t figured out how to add a title. There are “rooms” (sections) for titles, effects, transitions, audio, and more. These are very easy to navigate to — and through. However, for each item you want to add, you first have to add a “style,” and then you can edit it. There didn’t seem to be many built-in styles, nor were most of them very basic/general-purpose. So you have to get more or figure out how to make more. (See those icons down the left side? Those take you to the various “rooms.” Right now it’s set at the media files room.)
Which is all to say that I was a little disappointed with how steep the learning curve is for this software. However, I’m confident that once I can sort it all out, it will be pretty straightforward and let me do a lot with our videos.
When you’re ready to save, there are lots of options. You can create a disc. (I haven’t tried that yet, seeing as how I haven’t gotten “good enough” yet at the use of the software for editing to have a whole movie ready.) You can output to a file, in which case there are numerous options. You can output to AVI, AVC, MPEG-2 or -4, MKV, MOV, or WMV. When you click on each one, it does a pretty good job of describing what that particular output is used for, and most (if not all) of them give you file-quality options.

If you’d prefer, you can send your file straight to YouTube or other video-sharing sites. (This works most easily if you only have one YouTube account. I had a bit of hoop-jumping to do with Google to get signed out of my “regular” account and into my blog account. Which has nothing to do with CyberLink, but does make it a bit hairier to upload straight from the software to YouTube.)
The layout of the interface is very user-friendly. The upper-right segment shows the video preview. (Be sure it’s set to preview the movie and not the “clip,” or you’ll wonder what in the world you did wrong.) The lower section shows all of your tracks and is where you will click, drag, and drop to edit things. The upper-left has all of the editing “rooms” that give you access to your media files, transitions, effects, etc. — go to the room you want, then drag-and-drop the appropriate elements to the tracks below. Buttons across the top switch you over to production (saving), disc creation, etc. from the main editing screen. CyberLink has done an excellent job of fitting everything onto the screen in such a way that you really don’t have trouble finding anything you might need.
Bottom Line
I think this software is well worth the investment. However, you’re going to have to be willing to invest a bit of time in the beginning, too, to figure out what you’re doing. Once you’ve done that, you should have endless options for editing, saving, and burning your videos.
Disclosure: CyberLink provided me with a copy of the PowerDirector software to facilitate my review. As always, all opinions expressed here are entirely my own.
Thanks! Great post. I am actually having trouble with my videos posting to the wrong YouTube account too. I was wondering what you did through Google to rectify the situation? Appreciate any help…