
Have you ever felt the need to bookmark more than the one passage your Bible’s built-in ribbon bookmark allows for (or, in some cases, two)? Or maybe your Bible doesn’t have a built-in ribbon bookmark at all! This simple project can fix that. Learn how to make Bible ribbon bookmarks so you can easily mark multiple passages at once.
These also make great gifts. They whip up quickly and inexpensively, so they’re good for those “bulk” gift needs (like for a Sunday School class), as well.
Making Bible Ribbon Bookmarks
To begin, gather your materials. You will need:
- lengths of ribbon – Twelve inches seems to be a good length. I prefer 1/8″ ribbon, as it’s narrow enough to allow for a number of ribbons per bookmark, and marks the pages easily, but I have a friend who uses assorted printed grosgrain ribbons to make “fun” bookmarks. Mine are satin ribbons, purchased on sale. It was a long time ago that I bought these, so I don’t remember for sure, but I think they were ten cents a spool, for ten-yard spools. That makes these really inexpensive.
- strip of cardstock – I used standard cardstock, and it seemed to work fine. Index card stock (110-pound) might be even better. My strips are just one-inch-wide strips cut sideways from a piece of cardstock, so they’re 8-1/2″ long. That length seems to work just fine. One inch is a good width for most Bibles, but check the width of your Bible’s spine before proceeding, to be sure this will fit. Some thicker study Bibles can accommodate a one-and-a-half-inch strip; some slimline or compact Bibles probably need something closer to 3/4″. (You only need one strip of cardstock for a bookmark; I made a number of them in one session, so I just cut up the whole sheet of cardstock.)
- glue – I used a glue stick, and it worked great.
- scissors
- pencil and ruler, if you haven’t cut your cardstock into strips yet

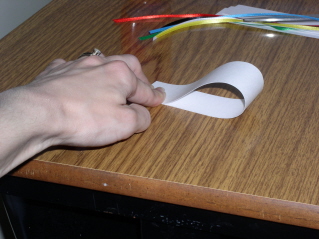
To begin, fold your cardstock strip in half, sideways (not lengthwise). It should still be one inch wide, but effectively only half as long. (Please pardon the photos. It’s hard to get a photo of something one is doing with one’s own hands, without significant blurring from being too close.)
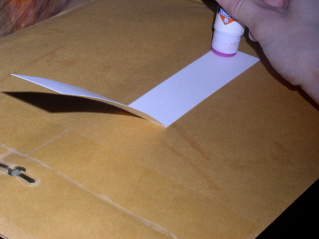
Working with the inside of the folded strip, coat about one inch of the end with glue. I recommend working on a piece of scrap paper, so you can glue to the edges without gluing your table! 🙂
One at a time, begin sticking the ends of the ribbons firmly to the glued surface. The longer ends should extend off the edge of the strip. I found that pressing the ribbon down firmly with a fingernail helped adhere it.
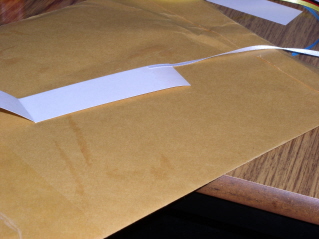
When all the ribbons are glued on, it should look something like this:

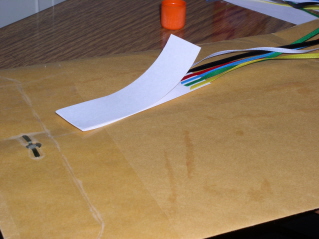
Turn the whole thing around, and thoroughly coat the inside of the bookmark with glue, on the opposite side of the fold (the side that doesn’t have the ribbons glued to it).

Close the strip up, where you previously folded it in half.
Press it down firmly, paying special attention the edges – particularly the edge where the ribbons are. At this point, I like to stick mine inside a heavy book, up to the edge of the cardstock, to keep them firmly closed while they finish drying.

When the bookmark is dry, it’s officially finished, although you may want to trim the free ends of the ribbons if they aren’t even. Cutting them at an angle will help discourage unraveling. (To further discourage unraveling, you can put a drop of white glue on the end of each ribbon and sort of “press” it in with your fingers so it soaks in. Be sure the ribbons don’t stick together while they’re drying!)
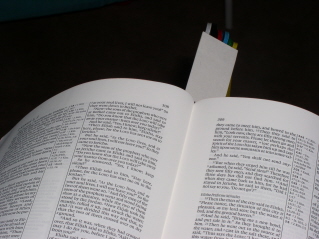
To use your bookmark, open the Bible up wide. This will open up a gap in the spine between the page block and the cover. Slide the cardboard into this opening. (The Bible must be open, because this space closes up when the book is closed. If you’re having difficulty sliding the card in, try opening the Bible slightly wider than flat – that is, so it looks like you are almost attempting to “close” it inside-out.) Push the bookmark in all the way up to where the ribbons start, so the whole cardboard strip is hidden. (It’s only partway in, in this photo.)
Distribute the ribbons among the pages as needed, and close up the Bible. And there you go!

(For these particular bookmarks, I chose colors similar to those in a “power band” or “wordless book,” so they can double as an evangelistic tool, if desired. The colors are: white, to represent the creation of man in purity and innocence; black, to represent man’s sinfulness after the Fall; red, to represent the shed blood through which we gain remission of sins; blue, to represent the waters of baptism; green, to represent spiritual growth; and yellow, to represent glorification/heaven.)
Thank you! I just made one for my son’s compact bible He loved it.
I’m so glad you found it useful!
Thank you so much for this Rachel. My compact Bible did not come with a bookmark. I was actually looking to purchase one online when I stumbled upon your page.
I just made one with suff I had laying around the house and it didn’t cost me a thing! Thank you!
I just made a number of these to give to people for our upcoming annual church conference. I am planning on putting a link to your site in either my blog (maturing withgrace.com) or my FB under the same name – or both. Thanks for giving simple directions for a quick, usable craft.
Heidi
Thank you, Heidi. 🙂 I’m glad this was helpful!
Thank you perfect and easy to follow
Was looking for this because
A. i am inpatient and didn’t want to order anything
B. My Psalter for Prayer didn’t come with any ribbons.
Thankfully I found this and am about to go shopping for the stuff I need to spend my nightshift. Thank you very much!