 I love papercrafting. Unfortunately, I’m not immensely skilled. And I’m not at all creative. I can follow instructions, but I’m not very good at coming up with ideas on my own. I’d love to learn some new techniques. The CardMaker Kit-of-the-Month Club is great for all of these reasons, and more.
The Club
As you probably gathered, after you sign up, you are sent a cardmaking kit each month. There are a couple basics you’ll need to have on hand, like glue (or some sort of adhesive) and scissors, but everything else you need to make 8-10 cards is included. Card bases, envelopes, and whatever embellishments are appropriate for the cards you’ll be making that month. This could be cardstock, stickers, rubber stamps (ink is not included, but the little $1 ink pads from Michaels work great), fibers, etc.
What’s more, each month’s kit teaches a different technique, so you can expand your repertoire of skills.
Why Sign Up?
So here’s my thinking. Cards are something we all buy anyway – they’re already in the budget. Each month’s kit is $16.99 plus shipping. I don’t know exactly how much shipping is but, for simplicity’s sake, let’s just round it up to $20/month. For $20/month you can make at least 8 cards, which is about $2.50/card. I can schedule a time each month to do this with my daughter, and we’re also spending quality time together (doing an activity that still allows for conversation). And I’m learning new techniques each month. Sounds like a win-win-win to me! And as I’m sure there will be bits and pieces of materials left over, we should eventually be able to put together our own cards with the leftovers (and our newly-acquired skills) and save even more!
Need to know what to put in your cards? Try Words to the Rescue
.
There’s a good deal of variety, so after a few months you should have a pretty good selection. And if ever you don’t like a particular kit (like if they send a Halloween card kit and you don’t do Halloween), you can just send it back and skip that month.
My First Kit
I was going to do a complete step-by-step but, frankly, some of the steps would’ve been pretty boring. This kit had two different card designs in it. (Half and half.) One was a square card; the other was this flower-shaped card. This month’s technique issanding. I’ve seen sanded work before, but I’d never actuallyused sanding in a paper project before this.
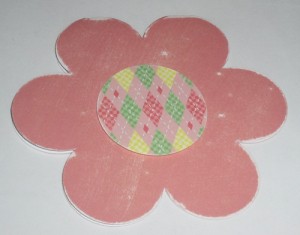
Here you can see the first couple of steps. I’ve sanded the card, and then I’ve glued on that circle in the center. I wasn’t sure how much sanding was good, but I think this turned out okay. The sanding distresses the paper and sort of adds depth. So this is the “background” of the card. (By the way, the cards came die-cut like that. I did not have to cut out that flower shape.)
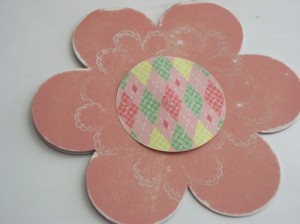
Here I’ve added the stamping. I didn’t do such a hot job of this. The stamp was included. It’s one of those clear silicone stamps. I don’t know if you’re supposed to use a special kind of ink with those or what, but I always seem to have trouble getting the ink to cooperate on this type of stamp. You can see that the process sort of mushed the sides of my center circle down a bit, but I fixed them afterward. It’s a bit clearer in this picture that I used a dimensional adhesive when attaching this circle, so it “pops.”
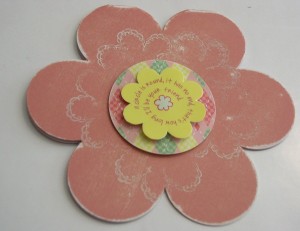
And, finally, the finished card. This sticker was also part of the kit, and it has also been attached with dimensional adhesive. Because it’s sticky on the back, it was stuck onto a scrap of cardstock first and then trimmed around. (Of course, if I hadn’t made it “pop,” I could have just stuck it to the paper.) This sticker reminds me of Girl Scouts!
I received a second kit, as well, but this post is already pretty long, so I’ll save that for another post.
Disclosure: CardMaker Kit-of-the-Month Club sent me two cardmaking kits to facilitate my review. As always, all opinions expressed here are entirely my own.


What a great idea! Love that you get a bit of ‘help’ in being creative 🙂