
Making the cold porcelain went just fine. Working with it, on the other hand…went not-so-well. I suppose I technically ended up with what I was going for, but the end result is not really a piece I’m proud of. And I will never, ever make this stuff again.
The Goal
Okay, here’s what I was going for: I used this Pin as inspiration and was planning to make that “product”with the cold porcelain found at this Pin (and various other sites). (Total side note: If you search Pinterest for “porcelain,” there’s some really gorgeous stuff!)
The Ingredients
The amounts/ingredients for all of the recipes were slightly different, but essentially the same. (Meaning, for instance, one might use vinegar where another uses lemon juice — both are acidic liquids.)
So I used:
- 3 c. cornstarch
- 3 c. Elmer’s Glue-All
- 1 Tbsp. lemon juice
- 1 Tbsp. glycerin
- 1 Tbsp. fractionated coconut oil (I didn’t have canola, and extra-virgin olive oil sounded…wrong. lol)
- 1 Tbsp. white tempera paint
(That’s essentially a cross between the recipe at the Pin above, and this recipe.)
The Process
First, I dumped all the ingredients into a cooking pot. (Note: Definitely be sure to use nonstick. It wasn’t too bad to wash up afterward, but I got the distinct impression it would have been really bad if my pan hadn’t been nonstick.)

Began to stir…

And stirred, and stirred, and stirred some more, until it was (mostly) lump-free.
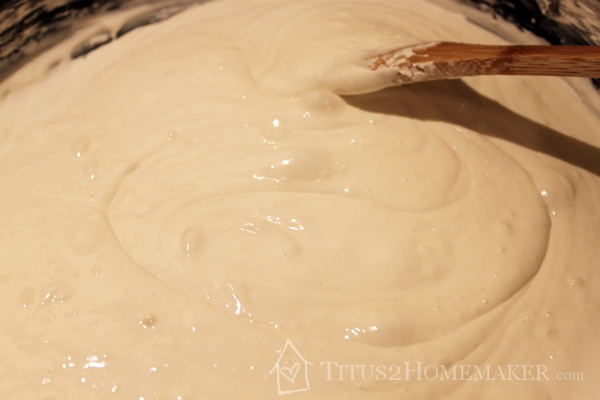
Then I continued to stir while cooking over low heat, until it was thick like dough. There might be some chemical reaction that takes place here, but I think it’s mostly just evaporating the water out of the mixture.
Another note: it started to dry out at the edges and on the bottom well before it got dried through. You know how when you scramble eggs you can tell when parts of it start to set up even though it’s not all done yet? This was kind of like that. I could start to see what it was I was going for, but then it took a while before it was all done. It was a little tough to keep up with stirring at this point, though!
Afterward, it looked like this:

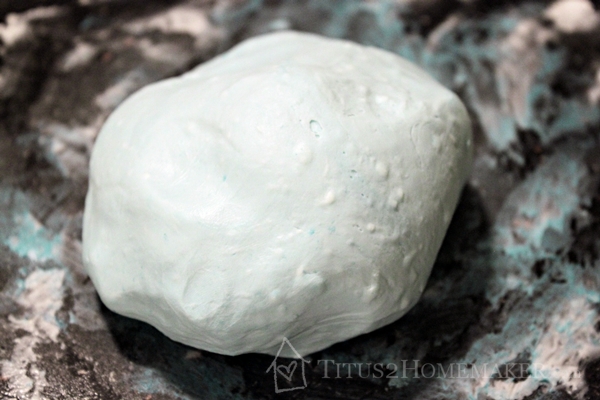
The next step is to knead it. (You might want to take your rings off before this part.) You have to let it cool a little so you don’t burn yourself! (Very important, because it will stick to your hands, and you don’t want burning hot stuff stuck all over your hands!!!) But I read that you should start to knead as soon as it’s just cool enough to handle; in hindsight, I’m not sure that’s really the case.
Anyway, I oiled the counter really well, oiled my hands really well, and started to knead. This stuff is really, really (did I mention really?) sticky. I had to re-oil things several times, and I still trouble with things sticking. I finally got it kneaded, though, and it looked a lot like this.

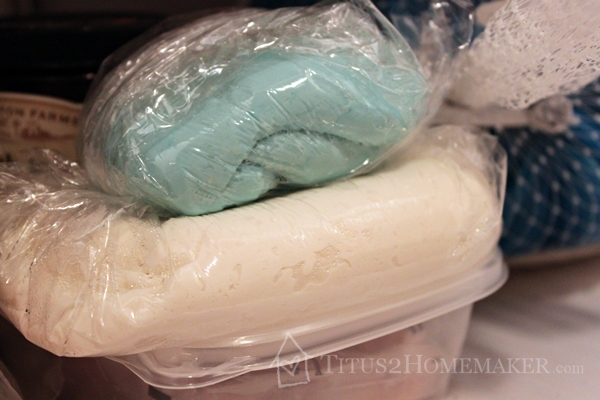
Now, I wanted some that was turquoise, but I wanted to leave most of it white. So I started with just the ingredients I mentioned. But once I got to this stage, I split it in two, added some turquoise to the second lump, and kneaded it in. Note that this is really messy and if my surface had not been black, I might have thought twice about this. I don’t much have to worry about whether this stains, though.
The turquoise looked sort of like this. (The picture came out a little weird, so it looks lighter in the picture than in real life.)
Then I wrapped each lump up in plastic wrap and popped it in the fridge. I think this step is only necessary if you’re not planning to use it right away, or maybe if your “clay” is not fully cooled. I think I could have used this right away, but it was late at night and I needed to wait, anyway.
Modeling with It
Here’s where it got really hairy.
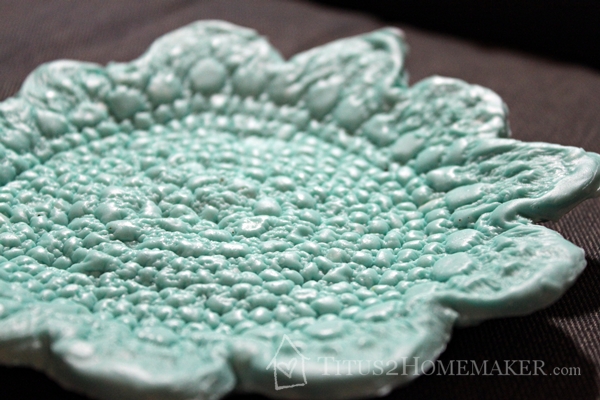
The plan was to oil the counter, roll this stuff out flat, press the doily in, cut around it, then peel the doily off, peel the clay up, and dry it in a bowl for a day or two to shape it. Straightforward enough.
Except this stuff was a nightmare to work with.
It started to stick to the rolling pin right away, but I caught that and oiled the rolling pin. I got it rolled out all nice and neat, then laid the doily on top and rolled it again (gently) to press the doily into the surface. So far, so good.
Then I tried to cut around it. It wasn’t nearly as neat as I would have liked. The “clay” kept wanting to stretch and pull. But I got that part done. I peeled the doily off — that was not a problem.
Then I tried to peel the thing up from the counter. No matter what I tried, it just would not work. I got a big old mangled mess. So I wadded it up, kneaded it together again, and tried again.
This time I rolled it out on plastic wrap. I was able to get the other parts to work (trimming the edges and pulling off the doily) about as well as before — and this time I actually was able to peel up the resultant piece. But still, by the time I got it over into the bowl, it was rather wonky. (Plus it has creases in the bottom from the plastic wrap.)

It shrinks funny as it dries. And it took forever to dry. After two days, the top was dry, but the bottom wasn’t. So I peeled off the plastic wrap. I was going to flip it over so the bottom could dry, but if I flipped it over, it was still just soft enough that it flattened itself back out. So back in the bowl it went. Two weeks later, it’s still just slightly…not dry on the bottom. (It’s not exactly “moist.” Just “not dry.”)
So it looks like this:
Which might be okay, if making it hadn’t been so awful I wanted to pull all my hair out, throw something, or harm somebody. 😉
I threw the rest of the stuff away.
Leave a Reply