The Need
Our family is part of a co-op that drives to a farm in a nearby state to purchase raw milk. We order and pay for our own, but because it’s a bit of a drive, the families take turns picking up everyone’s orders. And along the way, the milk jars like to clank together and sometimes even fall over. Towels tucked in between fix the clanking, but not the tipping. (I’ve had milk leak in my bag a time or two. Yuck!)
The Motivation
So I’ve really been wanting something a bit like a wine tote – with dividers that create compartments for each 1/2-gallon bottle of milk. I wanted some flexibility, though. I don’t always get the same number of jars. I’ve been putting the project off altogether, but got the nudge I needed to finally create my tote, when I was asked to participate in the “Waverize It” project with Jo-Ann and Waverly.
Here’s the deal: From September 1–22, Jo-‐Ann and Waverly are hosting a Waverize It! Facebook contest open to all consumers. (Keep reading to learn how you can enter. The grand prize is $1000 worth of Waverly fabric and a $250 Jo-Ann gift card, so you won’t want to miss i!) To help us get word out to you about the contest, they provided each of us bloggers with a couple yards of fabric to create our own entries in a separate blogger contest. (We aren’t eligible for the main contest.)
So I set to work with my Waverly fabric to make a milk tote. As it turned out, I didn’t have quite enough to make an actual tote (with all the parts and pieces I intended – there was plenty to make just a regular tote bag), but there was enough to make a liner. In the end, I liked that better anyway.
The Design
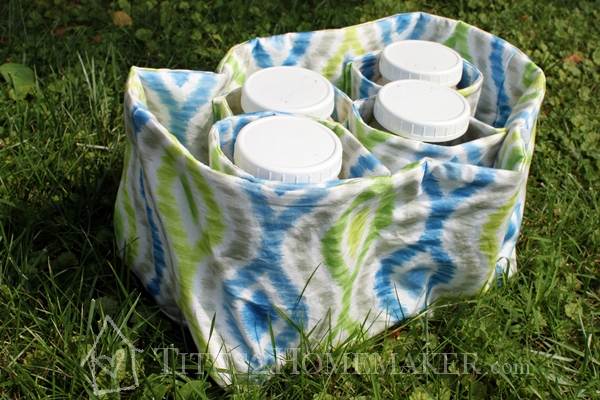
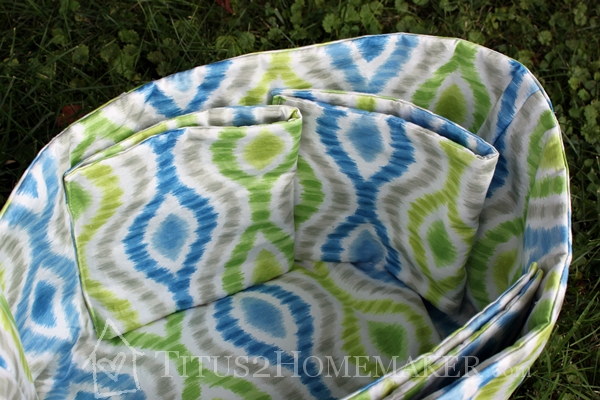
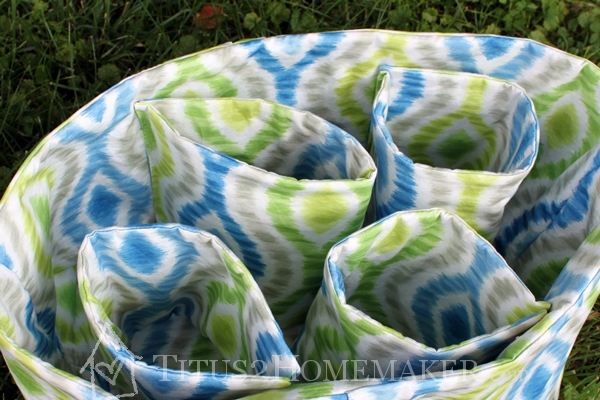
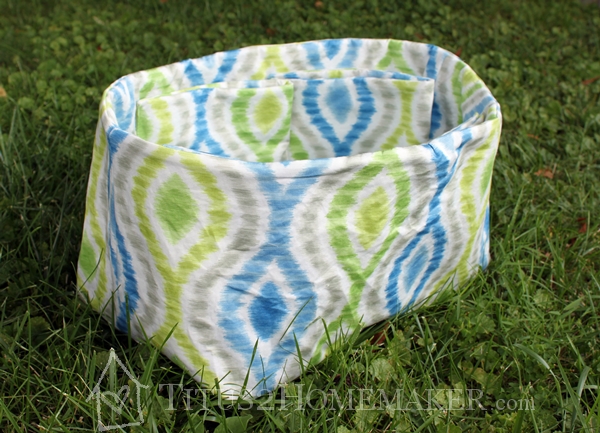
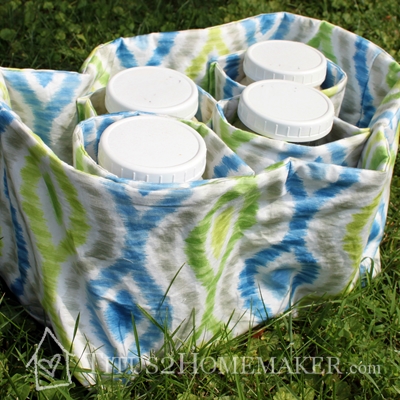
Instead of rigid dividers, I decided to make “loops.” These can fold aside to give you just one big open space if you need it. But when you do need them, you can just open them up and pop the jars in. Because they’ll “wiggle” a little from side to side, adjustments can be made for the arrangement of the milk in the bag.
The main “bag” itself is lined with Insul-Bright, as are each of the milk sleeves, to help keep the milk cold.
Because it’s a “liner” and not an actual tote, this can be used inside an insulated shopping bag (which is what I’ve been using, that they fall over in), a regular – but large – tote bag (‘though this would obviously not keep the milk as cold), or even a picnic basket or a bin or something.
I didn’t take step-by-step photos for a true tutorial, but if you’d like to make your own, here’s how I did it…
Making the Tote
Wash and dry your fabric, then cut the following pieces:
-2 tote pieces (30″ h x 26″ w)
-8 sleeve pieces (9″ h x 17″ w)*
-1 piece of Insul-Bright the same size as the tote piece**
-4 pieces of Insul-Bright 9″ high, but only 15″ wide
1. For the first sleeve, stack two sleeve pieces and a sleeve insulation piece as follows: place one right-side up, then one right-side down, then place the insulation on top, centered on the fabric.
2. Stitch the two long sides with a 1/2″ seam allowance. Turn right side out and press.
3. Repeat steps 1 and 2 to create the remaining sleeves.
4. To form the outside of the tote, fold the tote fabric in half, right sides together. (The folded – bottom – edge should be a 26″ edge.) Stitch up the two sides with a 1/2″ seam allowance and press the seams.
5. At each end of each milk sleeve, fold the edges to the inside and press, so they’re ready to attach. You want to have a small “hem” area at either end that doesn’t have any Insul-Bright in it. (Believe me. These get tricky enough to sew without trying to get the needle through two extra layers of Insul-Bright.)
6. Attach the milk sleeves. First, fold the tote lining piece in half, just as you did the tote piece, and press the fold. Then open it back up. This will make it easier to find the center. Now, stack the Insul-Bright under this tote piece and orient them so a 26″ edge is at the top. (The fold line you pressed in should be horizontal.) If you need to pin this together, you can.
7. Measure 8″ from the left edge and 5″ up from the center line. This should be the bottom of the seam line you’re about to create. Fold a milk sleeve in half, with the two open edges lined up together on the left. Then place it at the location you just determined. (So the actual edge of the sleeve should extend just beyond the line, to the left. Because you’re going to stitch a little in from the edge – right along the edge of the Insul-Bright inside the sleeve.)
This was thick enough I couldn’t pin it in place, so I taped it with invisible tape. Now stitch it down.
8. Attach the second sleeve in the same manner, the same direction. Its seam line should begin 16″ from the left and 5″ up from the center line.
9. Now rotate the entire thing so that what you just sewed on is on the bottom half, and you have a “fresh” top half. Measure and attach the remaining two milk sleeves in exactly the same manner. (They should be 8″ and 16″ from the new left edge, and the open edges of the sleeves should again face to what is now your left.)
10. Now turn this whole thing into a tote liner, by sewing it exactly like you did the outside of the tote. Fold the bottom edge up to meet the top edge, right sides together, then stitch up the sides with a 1/2″ seam allowance. Be careful not to catch the milk sleeves in your seam, and leave a large hole for turning the tote later. You’ll want this opening to be several inches down from the top edge so the whole seam doesn’t pull loose, but not too close to the bottom, because part of the bottom will become the actual bottom of the bag.
11. Square the corners: With the inner tote “raw” side out, stand the bag “upright.” Taking the bottom corner, flatten it. You’ll be pinching it in such a way that the side seam lines up along the center line you ironed in. You’ll want to take a pencil and mark across it at the point at which this corner triangle is 9″ wide. It should be 4-1/2″ up the seam edge. Stitch along this line. Do the same for the other end.
12. With the outer tote inside out, square the corners the same way. You can now cut off the excess corner, leaving only a seam allowance.
13. With the two bags right sides together, pin the top edges. (This should be the only part of the bag that’s still raw edges.) Be careful not to catch the milk sleeves! Sew this entire top edge with a 1/2″ seam allowance. (Mine had gotten all wonky, so I had to trim the top relatively even again.) Again, be sure not to catch the milk sleeves!
14. Pull the bag right-side-out through the opening you left in the lining. (If you forgot to leave an opening, you can probably use a seam ripper and pick an opening in the side seam. I’ve done that in the past.) This was a little like the sewing version of birthing a baby – it was hard wrangling all that fabric through that small opening!
15. Finish the bag: Hand-sew the opening closed. Press the top edge where you sewed things together. Ideally, this edge would then be topstitched, but we had a series of crises as I was attempting to get my bag finished and I decided it was “done enough” so mine is not topstitched.
Enjoy your bag!
This is not advanced sewing at all, but it is very awkward to wrangle through the machine because of the layers of Insul-Bright making it bulky.
*If you want a little more wiggle room in your milk sleeves, make these an inch wider.
**My Insul-Bright was not this wide; I’m not sure whether it comes quite this wide. If yours isn’t either, you can do what I did: Cut another piece to fill in the “gap,” then butt them flush against each other and zig-zag stitch to make the larger piece.
How You Can Enter
You can enter the Waverize It! contest with your own creation! Jo-Ann and Waverly are celebrating National Sewing Month and Waverly’s 90th anniversary with this Facebook contest. So head over to check out the Facebook page and decide what you’re going make!
This is brilliant, Rachel! Keeping jars safe and upright in transit is an issue I’ve dealt with for a while now. In fact, I created a series of patterns and finished bags, birthed out of the need to send my husband’s lunch in Mason jars. If anyone needs a pattern similar to this concept but with very detailed instruction, or even a finished bag, you can find them here: http://atinyforest.etsy.com But this insert is fantastic when you already have a container that’s doing the job, you just need the sleeves. Keep up the good work!