
I came across this video tutorial (see below) while looking for ideas for packaging gift cards, and thought these would make fantastic mini care packages. They’re easy to make, pretty inexpensive to put together, and not too large/expensive to ship. They’re not really full-on care packages, per se, but a step up from a simple card as a way to say “I’m thinking about you.” So…let me show you how to make a mini care package.
(If you’re “not crafty,” don’t bail on me just yet, because I’m going to show you an even easier alternative. If you can make a line of glue with a glue stick you can do this; I promise!)
The DIY Approach: Making the Envelopes
Amber (in the video) made her own envelopes using the Envelope Punch Board from We R Memory Keepers. I use the 1-2-3 Punch Board, which does the same thing. Either of these makes it very easy to make envelopes; you just punch it to make a little notch, and score, on all four sides, and then everything is all ready to get folded up nicely.
We R Memory Keepers Punch-1-2-3 Punch Board at Amazon We R Memory Keepers Punch-1-2-3 Punch Board at Scrapbook.com


- For a gift card size envelope, cut the paper 5-1/2″ square, and make first notch at 2-3/8″. (You can get two of these out of an 8.5×11″ sheet of paper.)
- For the size We R Memory Keepers recommends for a 3×4 card, cut the paper 6-1/4″, and make the first notch at 2-3/4″.
- For some reason, the 1-2-3 punch board skips right over 6-inch squares, but you can use a 6″ square as-is and make the first notch at 2-5/8″, and this will still fit a 3×4 card (just a bit more snugly). (Thanks to Amber for mentioning that measurement in the video so I didn’t have to try to figure it out!)

If you’re using the 1-2-3 punch board, and don’t mind a slightly larger gusset, you can just score on lines A and B for the first side, rather than going back later to score your 1/4″ gusset. It seems to be about 1/3″.
Choosing Your Paper
Whether you’re using a punch board or using a template to make your envelopes more manually, these little flip books are prettier with double-sided paper, but single-sided paper is totally fine. (Mine are all made with single-sided paper.) I do recommend avoiding obviously-directional prints, as the envelopes will be made on the diagonal. Stiffer paper seems to work best in the punch board.
Finishing the Envelopes

You can round the lower “flap” of the envelope as Amber has done, OR you can trim it straight. This is my preferred method. If you make envelopes very frequently, you might want to invest in a corner trimmer that does this for you, just because it’s a little quicker for mass-producing, but scissors work just fine. (I tried this one, and I don’t recommend it. What it trims off is too little to be useful.)
The Not-Quite-DIY Approach: If You’re Not Crafty
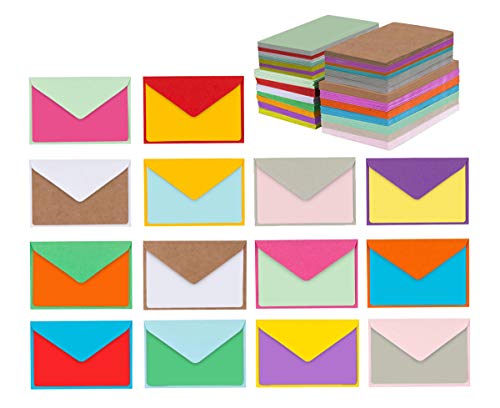
If you’re not a “crafty” person, or are just busy and don’t want to make the envelopes, you can make these from purchased envelopes! They might be a little less decorative because the paper isn’t patterned, but they still do the job.
If you go this route, I would recommend getting either colorful envelopes, or maybe go with something like kraft envelopes that will coordinate nicely with baker’s twine to tie them up at the end, rather than plain white. Choose your envelope size based on what you expect to put in them.
Gift Card Envelopes – 100-Count Mini Envelopes Small Note Cards, 10 Colors, 4 x 2.7 Inches Kraft Mini Envelopes Brown Kraft Envelopes for Gift Cards and Business Cards (4×2.75, 60-pack)140 Mini Envelopes with Blank Note Cards, Assorted Colors 4×2.7)


Follow the same tutorial, just skip past the envelope-making bit. (And you can use whatever glue you want; I’d recommend a glue stick if you don’t keep fancy paper-crafting adhesives on hand.) It’s basically gluing three envelopes together; you can totally do this.

Filling the Envelopes
So you have your little flip book. Now we get to the part where we make it into a mini care package: filling it.
A cute little card or note of encouragement plus an herbal or specialty tea bag are an excellent start. This is why I love the 3×4″-ish finished size. Scrapbooking and cardmaking kits often come with journaling cards that are 3×4″, which would fit in these perfectly.

It’s also a good size, if you are a crafter, for a small flat card of encouragement made from scratch. I’m thinking it would be great to make cards that feature encouraging Scriptures, and laminate them so the recipient has something sturdy that can be kept and carried around.
Of course if you’re making this primarily to hold a gift card, you can use the smaller envelope size, but your card or note will need to be smaller, as well.
Other small, mostly-flat goodies that could go inside these mini care packages include:
- card/note (already mentioned)
- tea bag (already mentioned)
- sugar or sugar + honey packets
- stamps
- individually-wrapped chocolate squares (probably not a great choice if you’re mailing this in summer)
- “mix tape” on a small flash drive
- hair ties or barrettes
- small bookmark (like the paperclip-style ones, or one that slips over the corner of the page)
- gift card for fast food places (that are located inside of or deliver to the hospital if your recipient is at the hospital) or coffee
- stickers
- jewelry
Papers I Used: Unicorn Dreams (Feb 2020 Card Kit of the Month from Spellbinders; no longer available), Peacock collection II, Marigold & Plum Collection.
Pack o’ Picked Paper: Peacock Collection IIPack o’ Picked Paper: Marigold & Plum Collection


[…] a complete NICU care package. (“Sending” one felt all kinds of wrong to put on a list, since it seems like hoping […]