
I don’t know about you, but I like to see how other people organize. It makes things more concrete for me, and gives me ideas to bounce off of for my own organization. So in that spirit, I’m going to show you some of what goes into my planner setup — with some ideas for simple ways to “pretty it up,” too, in case you’re like me and trying to work on being a little less spartan. (With thanks to Oriental Trading for providing most of the “prettying up” supplies.)
Bear with me, because this post is image-heavy.
My Overall Method
After shuffling back and forth between different setups — 3-ring, bullet journal, spiral-bound, etc. — I finally settled on a comb-bound system. I have a comb-binder, so for me this is a good balance between slim/compact and flexible. (I can add and remove pages periodically — just not daily.) The down side is that pages don’t come for this style, so I have to make my own. This requires an up-front investment of time, but not as much as you might think, now that I have a system.
If you’re using a different setup (which is likely, since this isn’t common!), some of exact details here might not apply to you, but a lot of the general page ideas still will.
I like to use paper printed off with a 1/4″ grid or dot grid, because that makes it pretty easy to draw a variety of layouts, etc. and not worry about measuring and all that (or being able to draw a straight line!).
Yearly
I like to have a simple all-year calendar, just to allow me to see all the major holidays and events at a glance. (I don’t really use this throughout the year, in the sense of writing appointments or anything on it. It’s just a big-picture view.) It’s folded into thirds(-ish), so I can use the full front of a sheet.

So first I do this — months down the left, and days of the week across the top (abbreviated, for the sake of space). Then I just fill in all the numbers. (The calendar in Windows is a handy reference for which months start on which days.) I don’t know if you can make out the grid in the picture, but it’s a lot easier than it looks to write these all in a row, because there’s just a number per box.

Then I like to use a colored pencil and gently (not too dark; you want to be able to write over it) shade in the weekend columns. This isn’t critical; it just helps break up the page visually and make it easier to follow.

I used washi tape at the top this year just to add another little pop of color. Now, this one isn’t finished yet (I’ve had final exams all week — crazy timing! — so I’m a little behind on my New Year’s planning), but from here I would draw little icons for birthdays, anniversaries, and major holidays. You can also mark any major events, if you like, such as a family vacation or a conference. (That’s why I left two rows for each month. It makes more space for the icons.)
These are not fancy! Just a little symbol so you can see where those occasions fall throughout the year. Here’s my calendar for last year, with birthdays, anniversaries, and biblical holidays added:

Monthly
My monthly pages are the most involved, because I make them into dividers so they’re easy to flip to. I print the dot or grid onto ivory cardstock so it stands out from the regular white pages, and I add tabs. This is where you can get kind of fun. You can use stick-on tabs like these, but I like to make my own so they’re flat and colorful. I’m going to get kind of detailed here.

After printing them and folding evenly in half, I trim off about 1/2″ of one short side. I use my guillotine cutter because it’s fast and easy, but if you don’t have one, scissors are fine. The reason they’re trimmed a little is so that when they’re punched…

The punched part can be bound in, but the page is still free to fold open. Eventually I’ll draw monthly grids in here. (This is the most tedious part of my whole process. You’ll see the overall layout later in this post.) But I’m also going to create and add tabs. You can do that before or after. After is probably better, so if you louse up drawing one of the calendars, you don’t have to redo your tabs. Here I’m just working with the tabs so you can see the process.
I started with an existing self-adhesive tab like the ones linked above, opened it up, and traced it to make a template. (You only have to do this once. Just save the template.) I wanted mine a little narrower, so I traced the left end, slid the tab I was tracing to the left, and then traced the right. Hopefully that makes sense.

In the past I’ve then traced this onto scraps of scrapbooking paper (one for each month). This year I washi taped index cards and used those.


Now, you can totally just use glue stick on the backs of these (coat the whole uncolored side), but I have this nifty Xyron sticker maker sitting around collecting dust, so I run them through that. It just stickifies the backs.


Now it’s time to stick them on. I use the grids on the paper for this, too. Figure up once how far apart you need them, and then you can just line them up to the grid lines.
Once it’s sticky all over the back, stick the front side on.

Then fold it over and stick it to itself and the other side of the page. (By the way, it’s the folded edge of the pages I’m adding these tabs to.)

Holding the next “page” behind this one lets me see which dots to line the next tab up with.

And just continue like this until they’re all tabbed.

Each of these will open up to reveal the full month’s calendar inside. Mine have been pretty boring in the past, for the most part, but I’m trying to get better about adding some decoration without stressing over how good (or bad, haha) it looks. (This is not essential if you don’t care, of course. Plain is functional. This is just a way I’m trying to stretch myself.)

This March page, for instance, just has some washi tape and a gold Sharpie. (The white boxes are where I covered over birthdays and anniversaries for the privacy of friends/family members.) That 22nd box, for instance, is full of leopard print washi tape just for fun, because I love leopard print and that’s my birthday.
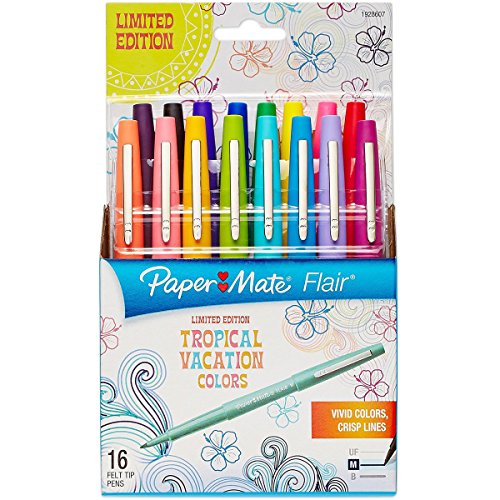
Paper Mate Flair Felt Tip Marker Pen, Assorted Tropical, Medium, 16/PackGet ItAvery Index Tabs, with Printable Inserts, 1.5-Inch, 25 Tabs, 1 Set (16230)Get ItXyron XRN500 5 Inch Create-a-Sticker Machine, NewGet It

&
With the outsides of the folded pages, you can do some different things. When I’m actually sort of on top of things, I like to put my monthly goals on the front side.

For a few months I tried putting a habit tracker on the back, but I wasn’t good enough at making it a habit to use the tracker for it to be useful!
Daily
My daily pages are the simplest of the bunch. I work them mostly like a bullet journal, but I created a fancier kind of “daily header,” largely so I can easily tell where each day starts, and partially because of the whole trying-to-get-more-creative thing. But here’s the deal: this header is entirely straight lines, so it only take a few seconds to draw out each day. I had a stamp made up so I can quickly stamp the hours across the top, but they can also be done by hand if I don’t have it around.

(As you can see, the top one didn’t stamp well. Something lumpy was underneath.)

I can circle what time I got up and went to bed (although I’m not very consistent about this). And I put a triangle around appointments. Then in the list below, appointments are triangles and to-do’s are checkboxes — each of which starts out blank and is filled in after I complete it. Other notes I want to remember just get bullets. Like if a kid loses a tooth or something.
Then if I want to, and have time, I can add decoration to these daily sections, or doodle in between them. When I have time, I like to add Scriptures or other quotes and practice jazzing them up. But this works to, so I’m good if I just need the basics, but also have the flexibility to fancy it up.
Easy Options for Jazzing Up Your Planner
You’ve already seen some of these hinted at, but let’s get a little more specific, shall we? First of all, color can be a super-simple choice. Apart from the colored pencils I use for shading the yearly calendar, I primarily work with these. They come in a variety of colors, they work like markers, but they don’t typically bleed through unless you go really heavy with them. (They do shadow some unless your paper is very thick. But they don’t bleed.)
Then we have a variety of options exemplified by this selection from Oriental Trading Company: stamps, stickers, rub-ons, and washi tape.

When you’re looking at stamps, look carefully at the individual stamps, not just the theme. For instance, a “sewing” set of stamps doesn’t seem like an immediately obvious choice for planner stamping. But look at the stamps I have circled. All of these would work — as borders, dividers, place holders, bullets, etc.


This one has some good options, too:

Stickers can be especially handy for headings, like this:

Here are a few more examples of them at work. (Sorry some of them are preliminary. It’s still early in the year!)

This pin I’m going to use to “hold” my final grades (which I don’t have yet). The stitching below helps form a divider from the bottom half of the page (which will probably be the next day).

This speech bubble is a good place to put an inspirational quote for the start of the year.

This one brings attention to the day my final semester ends. (I haven’t actually written in the text; I just have a pencil-scrawled placeholder for the moment.)


(My rub-on kind of failed. I’m not sure if that’s the rub-on’s fault, or my skills.)
All of these options are pretty quick. Stamps take the longest, because you have to pull out ink. But stickers and washi tape you can just slap on there. Rub-ons only take a little longer. (Temporary tattoos can work, too, either on thick paper like card stock if you’re careful not to get the paper overly wet, or on your covers, etc.)
You can start with the just the basics — something functional — and add just as much fun as you want, only as often as you have the time and inclination.
A Couple Last Tidbits
I wanted to just show you a couple other “pieces” I have in my planner in case they’re helpful/relevant to someone.

I have one of these (above) for each of my classes. I just copy-and-paste the list from my syllabus onto only the left side of a landscape-formatted document. Then I can fold it in half and punch it to add to my planner. (I don’t actually need the point values — just wanted the dates — but it was more work to take them out than leave them in.) This way I can tell at a glance what I have coming up and when things are due.

And then this is a method I’ve found really handy for Christmas gift planning. This page is folded over just like the monthly pages. I have it labeled on the outside as Christmas, so I can find it easily. But the actual content only goes on the inside. That way I always have my list handy, but it’s hidden from anyone casually flipping through (or nearby while I’m flipping through).
And as you can probably tell, it’s still blank. I’m not that much of a planner! I will probably write down the list of names in the next week or so, so I have a “blank list” and a place to jot down any ideas I come across. But I won’t be doing any intentional planning for a while.
Do you have favorite tips, tricks, materials, or supplies for your planner?
This is great! I received a planner for Christmas and although I want it to look pretty I don’t want to spend hours per day on it. Great info to get me started.
Exactly! The planner is supposed to help plan the day, not be the day!