Something that many bloggers/stay-at-home moms have talked about doing to save money — on gifts if not on household supplies — or just for fun, is making soap. I’ve made soap twice (not in a while, though, I need to do it again), and I’m glad I started with the method I did, because it’s soooo easy. It’s called “crockpot hot process” soap.

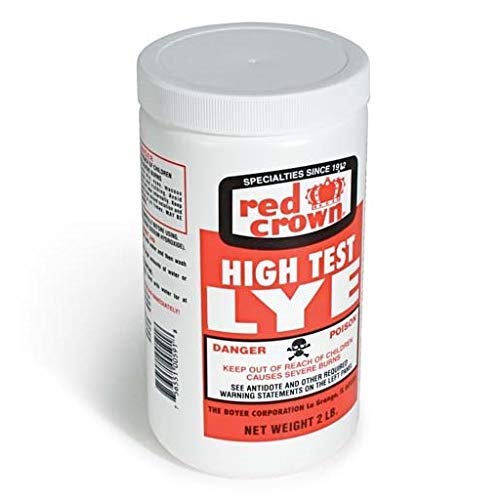

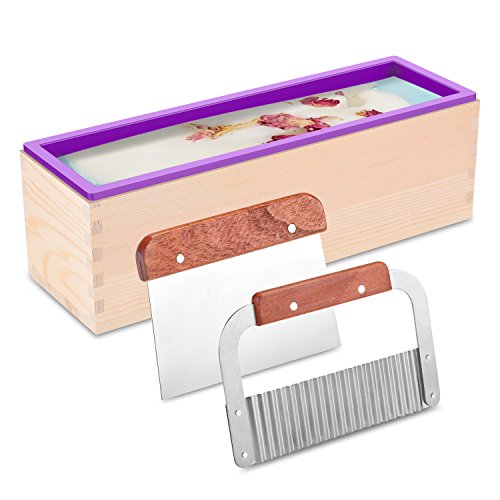
Some people will suggest that you use protective eyewear and gloves and this is probably a good idea (because of the lye involved). I didn’t; I was just careful. I figure they didn’t have safety goggles 200 years ago when they were making all of their household soaps from scratch, and most of them didn’t get seriously burned. 😉 I would not, however, recommend making soap around small children or uncaged pets. You don’t want anyone or anything running under your feet while you’re mixing lye.
Making the Soap
STEP 1
Obtain a soap recipe and gather the necessary ingredients and a mold. I’m not sure if you need separate recipes for hot- or cold-process soapmaking, because I’ve never made cold-process soap, but this is a “hot” process, so just make sure your soap recipe is good for that.
I have a super-easy recipe to share, but it doesn’t make very impressive soap. It’s good for a first-time experience, but if you want “nicer” soap, you probably want to just find one somewhere else.
Keep in mind that soap ingredient measurements are by weight, so you will need a scale. (A kitchen scale can be had for about $10.) This is very important, to ensure that the lye-to-oil ratio is correct so that all the lye will “disappear” into the finished soap.
STEP 2
Pull out the crockpot and plug it in. Add the oils.
If you have solid/semi-solid oils, you can do this two ways. You can just dump it all in and wait for the crockpot to melt it, or you can melt it first and dump it in once it’s all liquid. The second is definitely faster, but it’s likely to give you an additional greasy container to wash.
Turn the crockpot on. Start on low; some crockpots can be turned to high later. One of mine worked great on high; the other burned the soap on high. Just watch yours and see how slow it seems to be.
STEP 3
Wearing protective goggles and rubber gloves (if you choose to use them), mix the lye into the water (not the other way around) in a nonreactive container with a nonreactive utensil. (I use a wooden spoon and a plastic pitcher.)
Be sure to do this away from your face, as it will immediately begin steaming! Stir until the lye is completely dissolved.
STEP 4
Stirring constantly, add the lye mixture to the crockpot. Continue to stir while you wait for the mixture to reach “trace.”
This is when you can drip a little of the mixture back into the pot from the spoon and a “trace” of it will remain. (It will leave a little visible trail on top of the surface. You’ll know it when you see it.)
The time this takes will vary, depending on your crockpot, your recipe, the quantity, etc., but we’re not talking hours. I think it took less than half an hour for mine to reach this point.
STEP 5
Put the lid on and leave the soap to cook until it reaches the “Vaseline stage.” This is when it looks like a translucent mass. (It looks…like Vaseline.)
The soap begins cooking from the outside edges first and this cooked soap sort of rolls into the center like a wave (albeit much slower!) as it cooks. When it once again all looks the same — that is, the translucent look of the soap at the outside edges has fully reached the center of the pot — it’s done. The chemical reaction has been fully completed and you should have soap rather than lye and oil.
(This also means that anything left in your crockpot should be fully safe to just wash out. It’s perfectly okay to eat out of this pot again in the future.)
STEP 5a
While the soap is cooking, make sure your molds are prepared. (Grease them.)
Anything smooth, solid, and hollow that can take the heat can be used as a mold — plastic egg halves (set into egg cartons to keep them upright), drawer dividers, baking pans, etc. They don’t have to be “real” soap molds, necessarily.
STEP 6
When the soap is fully cooked, stir it gently to break up any air pockets and make sure that it really is as consistently cooked as it appears, and add any essential oils, fragrance oils, and/or colorants that you’re using.
Stir until incorporated throughout, and glop the soap out into the molds. (Remember that the crock is hot! And don’t forget to turn it off and unplug it when you’re done.)
Tap the molds firmly on the counter/table to break up air bubbles, cover with plastic wrap, smooth the top as well as possible, and leave to harden.
STEP 7
Hardening time will depend a little on the recipe and the size of your molds, but it should be hardened after sitting over night, and can be unmolded.
Unlike cold process soap, which has to “cure” first, this soap can be used immediately, although letting it sit for a week or two will let it dry out more and it will be harder and last longer.
You can slice it before or after this “airing-out.”
STEP 9
Enjoy your soap! 🙂
It’s Not Difficult
That may sound like a lot of steps, but it’s really very easy. As long as you measure accurately and use reasonable care, it’s all pretty straightforward and safe, and not any harder than baking a cake.
A Simple Crockpot Hot Process Soap Recipe
Simple Soap
Equipment
- crockpot
- plastic pitcher
- wooden spoon
- soap mold(s) ("real" soap molds or just something that will serve)
Materials
With Shortening
- 50 oz. vegetable shortening (Yes, just the cheap stuff. That we don't eat around here.)
- 19 oz. water
- 6.5 oz. lye
With Lard
- 50 oz. lard
- 19 oz. water
- 6.3 oz. lye
Instructions
- Choose ONLY one set of ingredients -- either the recipe with lard or the recipe with vegetable shortening.
- Prepare molds.
- Measure shortening, being sure to allow for the weight of the container. Warm in slow-cooker until melted. (This can take a while.)
- When shortening is melted, measure water in pitcher and measure lye in a separate container. Take outside, if possible, and mix lye into water (not the other way around!) with wooden spoon. Stir until lye is completely dissolved.
- Take lye water back inside and mix into melted shortening. Continue stirring until mixture reaches trace. "Trace" is when you can lift the spoon and drizzle some of the soap into the mixture and it remains momentarily on the surface, leaving a "trace". (The reason for stirring during this time is to keep undeveloped lye from being left in your finished soap.) Now you can stop stirring. Leave the cooker on, though.
- After a little while, the edges of the soap will start to bubble up and sort of fold over onto the middle of the soap. The bubbly part will gradually extend toward the middle of the pan. When all of the soap is bubbly -- it will look like applesauce or gloppy Vaseline -- it's finished.
- You can now plop it into your mold(s). You might want to tap them on the counter several times to help eliminate air bubbles.
- Leave overnight, then unmold and cut. This soap can be used immediately or you can leave it for several weeks to dry out and harden.

Rachel, is it really that easy? Do you make your own often? I just bought the book “Simple soap making” and it should be in today or tomorrow. It was pretty hard to find lye too. Anyway, care to share what oils you use? Thanks! I’m excited to make my first batch. Shannon
Yes, it really is that easy!
I have not made it in a while, because with a very difficult 3yo underfoot, it doesn’t seem safe. lol But it was just as easy as mixing up a cake or something. 🙂
I think I used vegetable shortening when I did mine. It’s probably not the *best* oil, but it’s an easy one to start with. And I think I got my lye at Ace Hardware.