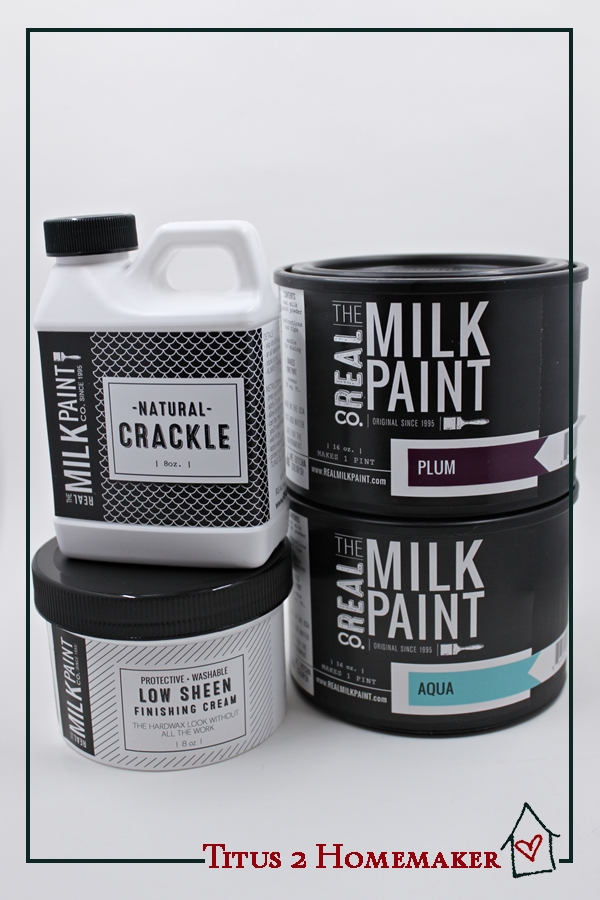
The Real Milk Paint Co. makes milk paint, obviously, but that isn’t all they do. They make a variety of paints and finishes that are non-toxic, no-VOC (volatile organic compounds), etc. and environmentally-friendly. One of the newest products is the Natural Crackle, and I gave that a try, together with the milk paint in plum and in aqua. (I haven’t tried the finishing cream yet.)
Real Milk Paint
The Real Milk Paint comes in a powdered form.

When you open up the canister, you’ll see something like this:

That little baggie is also sitting atop a marble.

Now what you’re supposed to do is dump the powder into the canister (with the marble still there), add an equal amount of water, and then seal the top on and shake the paint up. The marble helps with the mixing. I didn’t need the whole pint of paint, because right now I just wanted to be able to test out the paints and the crackle finish, so I chose to mix a very small amount of paint in baby food jars — with somewhat mixed results.


(The pictures here and the mixing photos are taken in my bathroom and the lighting did weird things to the color of the purple paint.)
First, I measured out two tablespoons of paint powder into each baby food jar.

Then I added the correct amount of water to each, screwed on the lids, and shook them up.

Now, remember the marble? Baby food jars don’t come with marbles. So they were lacking some of the “mixing power.” The aqua seems to have still done quite well, but the plum paint didn’t dissolve as well, and stayed a little thin and gritty. You’ll see that in the rest of the pictures. (Next time I’d probably put the marble into the jar, but I didn’t think of that.)
I wouldn’t call this no-odor. It’s different than regular paint. I thought it smelled rather strongly like ammonia, personally. But it didn’t leave any lingering odor like regular paint does.
This is what my little test piece of wood looked like after double-coating it:

Natural Crackle
After the paint layers were thoroughly dry, I added the crackle coat. The way this works is that you paint your bottom color (let dry), paint the crackle coat (let dry), then paint the top color, and the crackle coat forces the top coat to crackle up as it dries.
According to the instructions, you can apply this as-is for “larger cracks,” or you can thin it with water for finer cracks. I decided to use it straight on one color and add a little water to the other. Painted it on, and let it dry:

The crackle coat is almost odorless. It has a very mild sweet smell only if you sniff it. (Which I don’t recommend, but I did want to know what to tell you about the smell.)
Now for the moment of truth: the top layer. I painted each end of my test board with the opposite color I’d started with:

And waited for it to dry:

(You can really see the “grit” that was left over in the purple paint here. I’m pretty sure that wouldn’t be there if I’d mixed it in the canister according to the instructions.)
Here you can see the difference it made to dilute the glaze vs. not diluting it. In the paint with the aqua top coat (where I diluted the crackle coat), the crackle is almost pointless. It adds a bit of texture, but that’s about it. The one with the straight crackle (plum top coat) is much more visibly crackly, allowing the underlayer to show through.

(And I think it would have worked better if I’d mixed my paint better so it didn’t have “grit” left in it. I think that interfered with the crackle effect on the side of the board where it’s more significant.)
All in all, although there’s a little bit of a learning curve, because working with paint you have to mix from powder is a little different from what most of us are used to, I’m pretty pleased with this, and I look forward to further experimentation.
Leave a Reply